Linux (Unix-like) servers are very popular choice in the tech world. A majority of web and file servers are hosted on Unix and Unix-like operating systems. At the same time Microsoft Windows Servers are utilized by all major organization for its easy-to-use features such as Active Directory Domain Services, also simply known as, domains. If you have a mixed environment with both Linux and Windows servers or Linux desktops (end devices) and Windows servers, you need to be able to Windows domain join Linux machines. This is a step-by-step guide on how to domain join a CentOS, which is similar to RHEL (Red Hat Enterprise Linux) to an existing Windows Domain.
You may watch the video instead of using this article.
Preparation
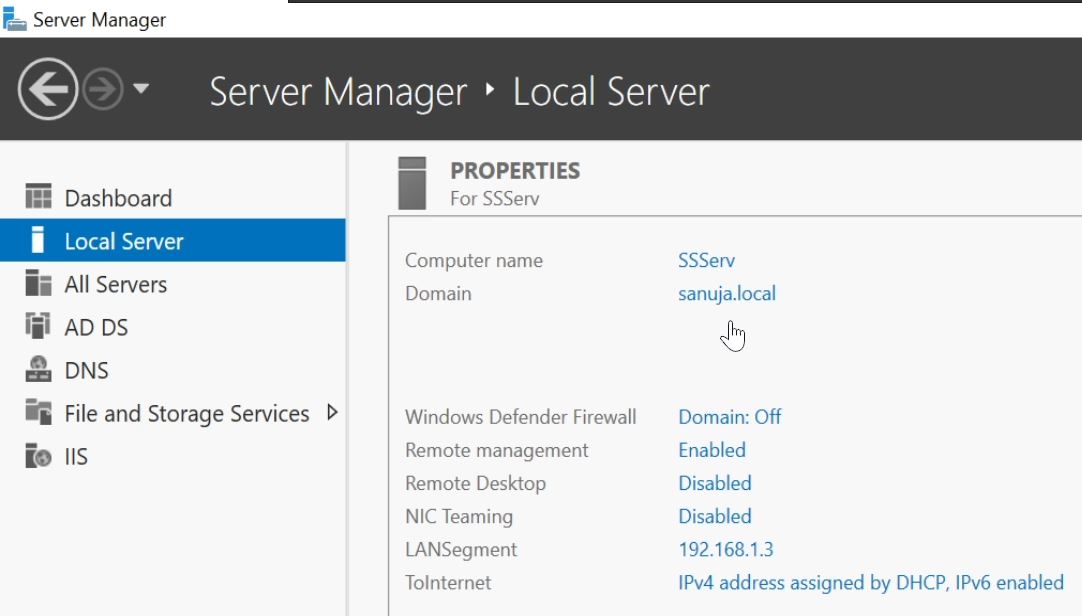
You should have a Windows Server (in this example Windows Server 2019) with the server promoted to an Active Directory Domain Services (AD-DS) domain.
A Linux machine with OS and packages updates done so the system and the repository are up-to-date. In this demonstration, we will be using CentOS 8. The command for update is yum update. If you are using other versions of Linux other than CentOS or RHEL, please use the appropriate commands (for example, Ubuntu, it would be apt-get update and apt-get upgrade).

Notice
This demonstration is done using CentOS 8 and Windows Server 2019. Same method can be used to domain join RHEL, Ubuntu and other Unix-like distributions. However, the specific commands used in this article must be modified accordingly.Step-by-step Guide
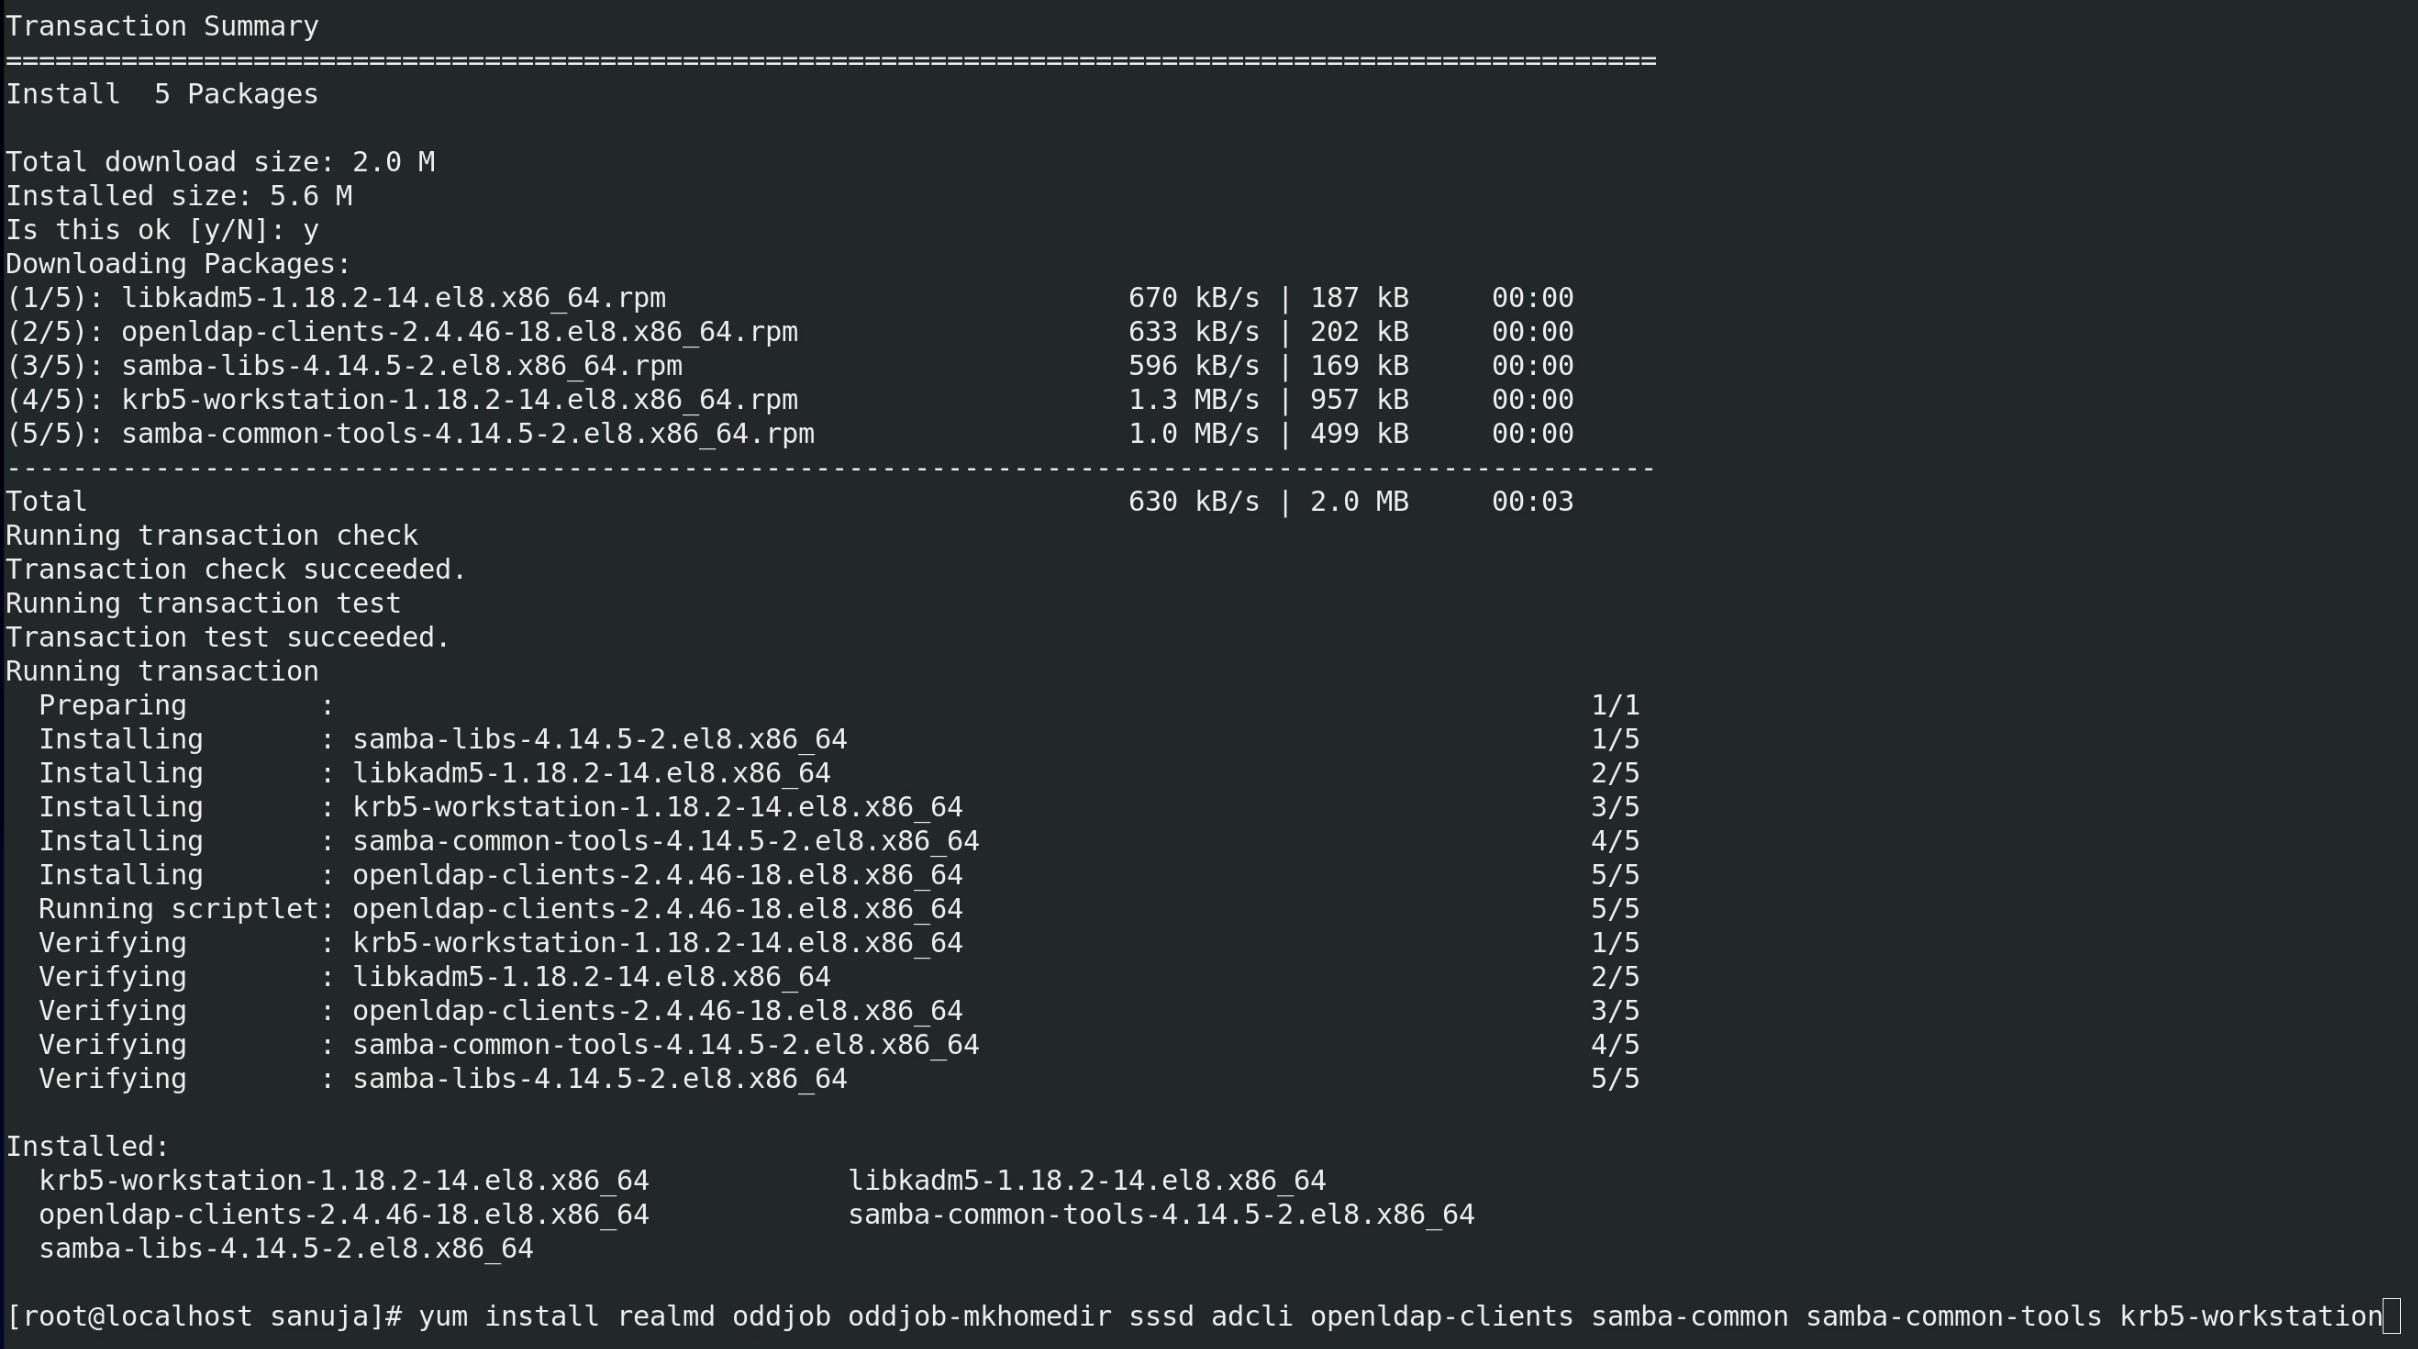
Step 1: On the Linux machine, install the following packages needed for the domain join process that includes Kerberos, Samba, Realmd and few others.
realmd
oddjob
oddjob-mkhomedir
sssd
adcli
openldap-clients
samba-common
samba-common-tools
krb5-workstation
You may copy and paste the following combined command in CentOS 8:
yum install realmd oddjob oddjob-mkhomedir sssd adcli openldap-clients samba-common samba-common-tools krb5-workstation
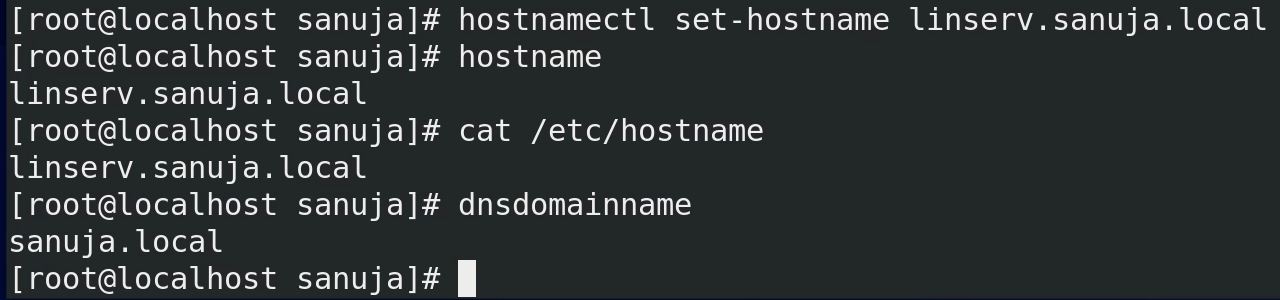
Step 2: Set an appropriate hostname for the Linux machine. The hostname should also include your Windows domain ending. For example, if your domain is sanuja.local, your Linux hostname should be hostname.sanuja.local where “hostname” is a term of your choice. To change the hostname in CentOS 8, use the following command:
hostnamectl set-hostname hostname.sanuja.local
You should check your hostname change with the following commands:
hostname
cat /etc/hostname
Both above commands should return full hostname including the domain ending.
dnsdomainname
The DNS domain name command above should return only the domain name at the end of your hostname.
Step 3: Confirm the Linux and the Windows Server are on the same network. To join the domain, both machines must be on the same network and in the same subnet. I would recommend that you have a static IP address on the Windows Server with the Domain Controller installed. The Linux machine may use either a DHCP IP from a pool or use static IP.
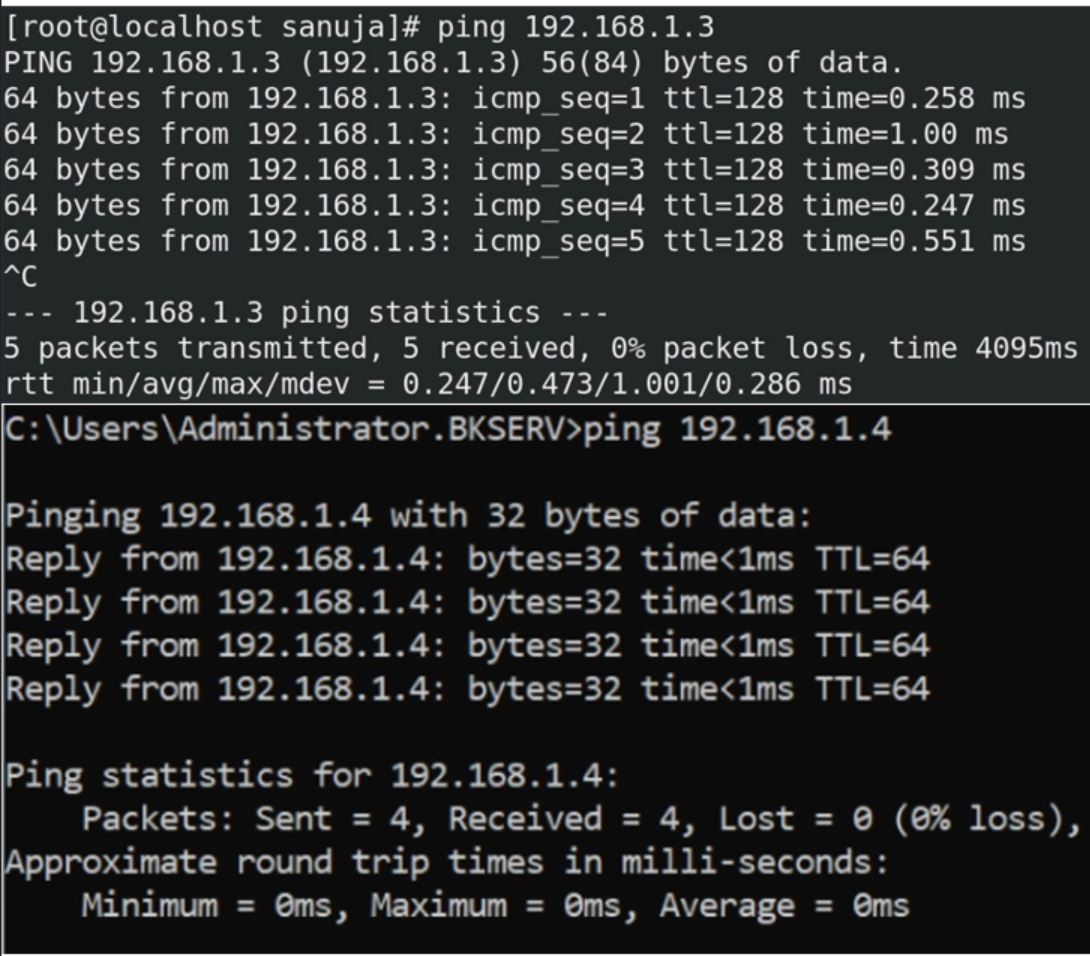
Step 4: Confirm Linux Server (or computer) and Windows Server can ping each other. From the Linux machine, ping the Windows Server IP and from the Windows Server machine, ping the Linux IP. This proves the connectivity between the two machines.
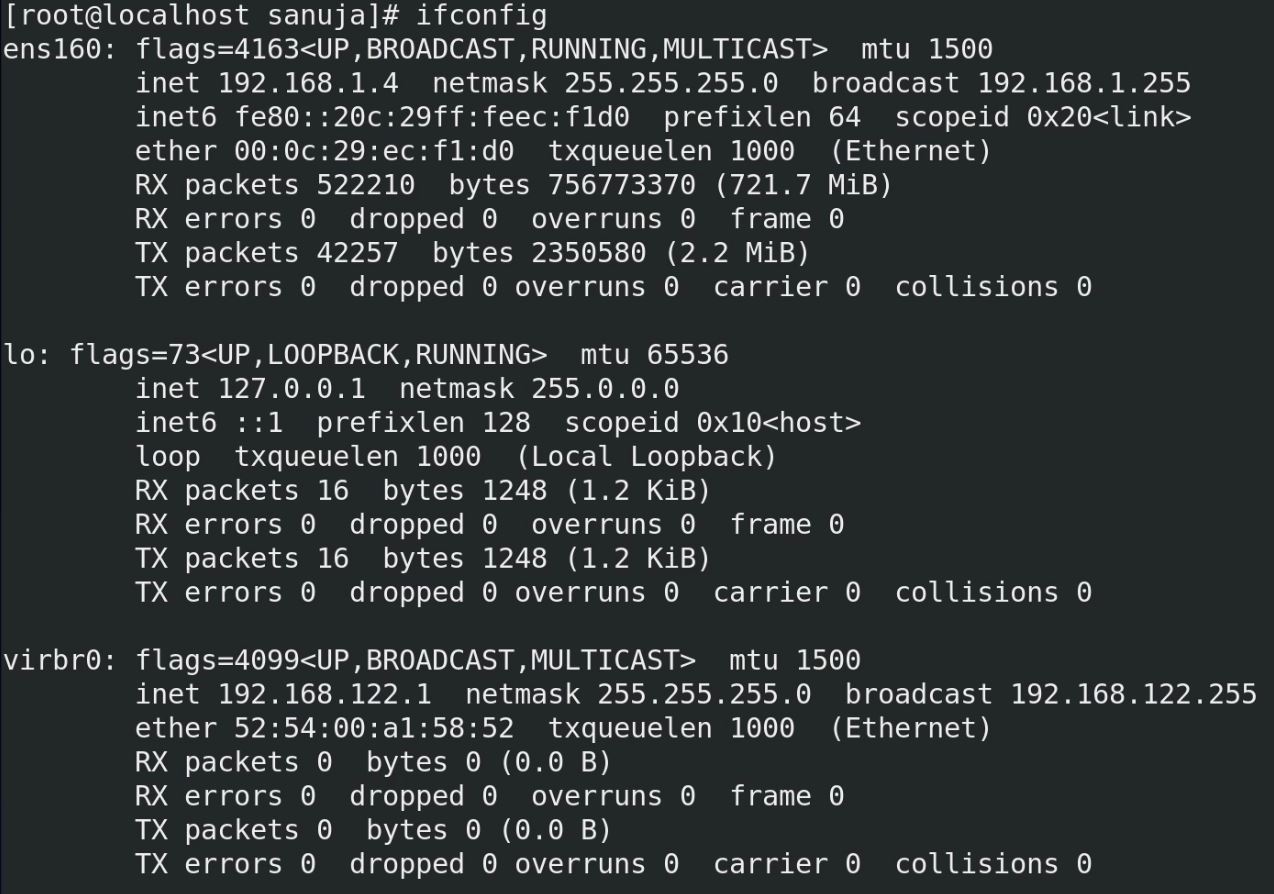
Step 5: Now, we need to setup the Linux hosts file. First you need to know your IP address of the Linux. If you have used a DHCP to obtain an IP for the Linux, you can use ifconifg command to check the IP (you may also use it for static IP checks as well).
Change the configuration within the hosts file. To open the hosts file, use the following command. I am using nano but you may use vim or gedit as well.
nano /etc/hosts
In the hosts file, you will see two line already entered by the system. The first line is for the IPv4 loopback (127.0.0.1) and the second line is for the IPv6 loopback (::1). We may either leave both these line as it is or we can replace the IPv6 loopback line. In this demonstration, I am replacing the IPv6 line with the edits I want to make.

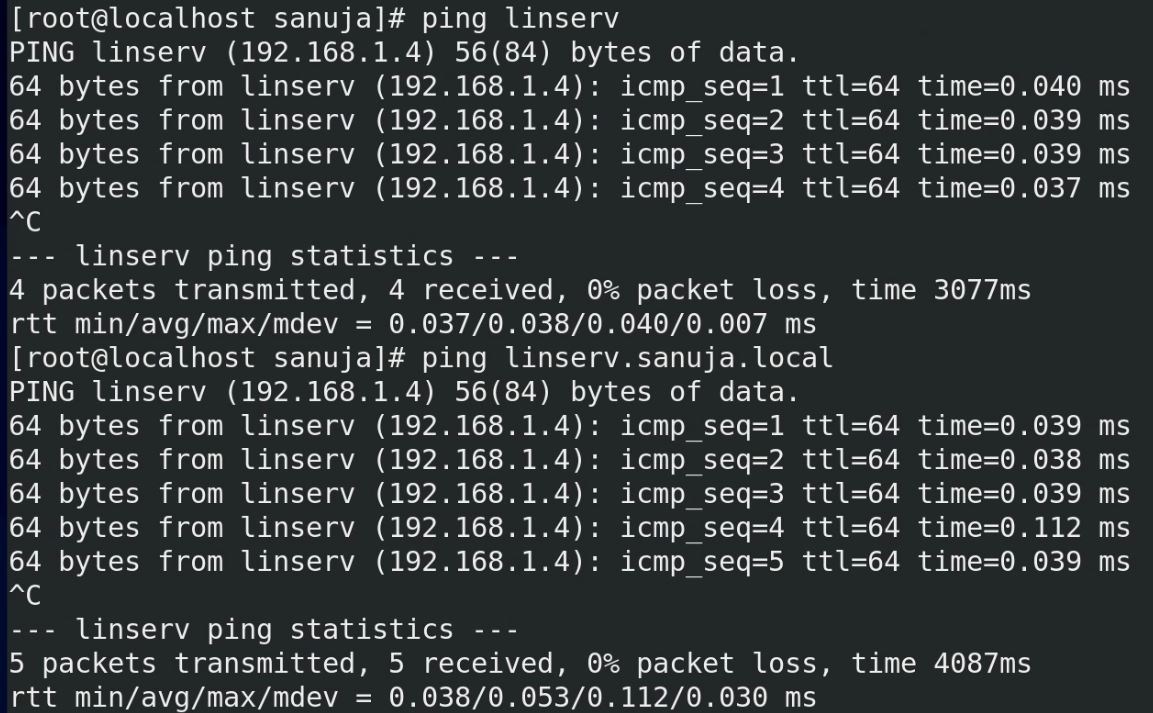
Add the IP address of the Linux machine along with hostname and the complete hostname with the domain name at the end. For example, 192.168.1.4 linserv {space} linserver.sanuja.local.

Step 6: Confirm the hosts file change with pinging the Linux machine using its own terminal. Use the hostname and full hostname to test it.
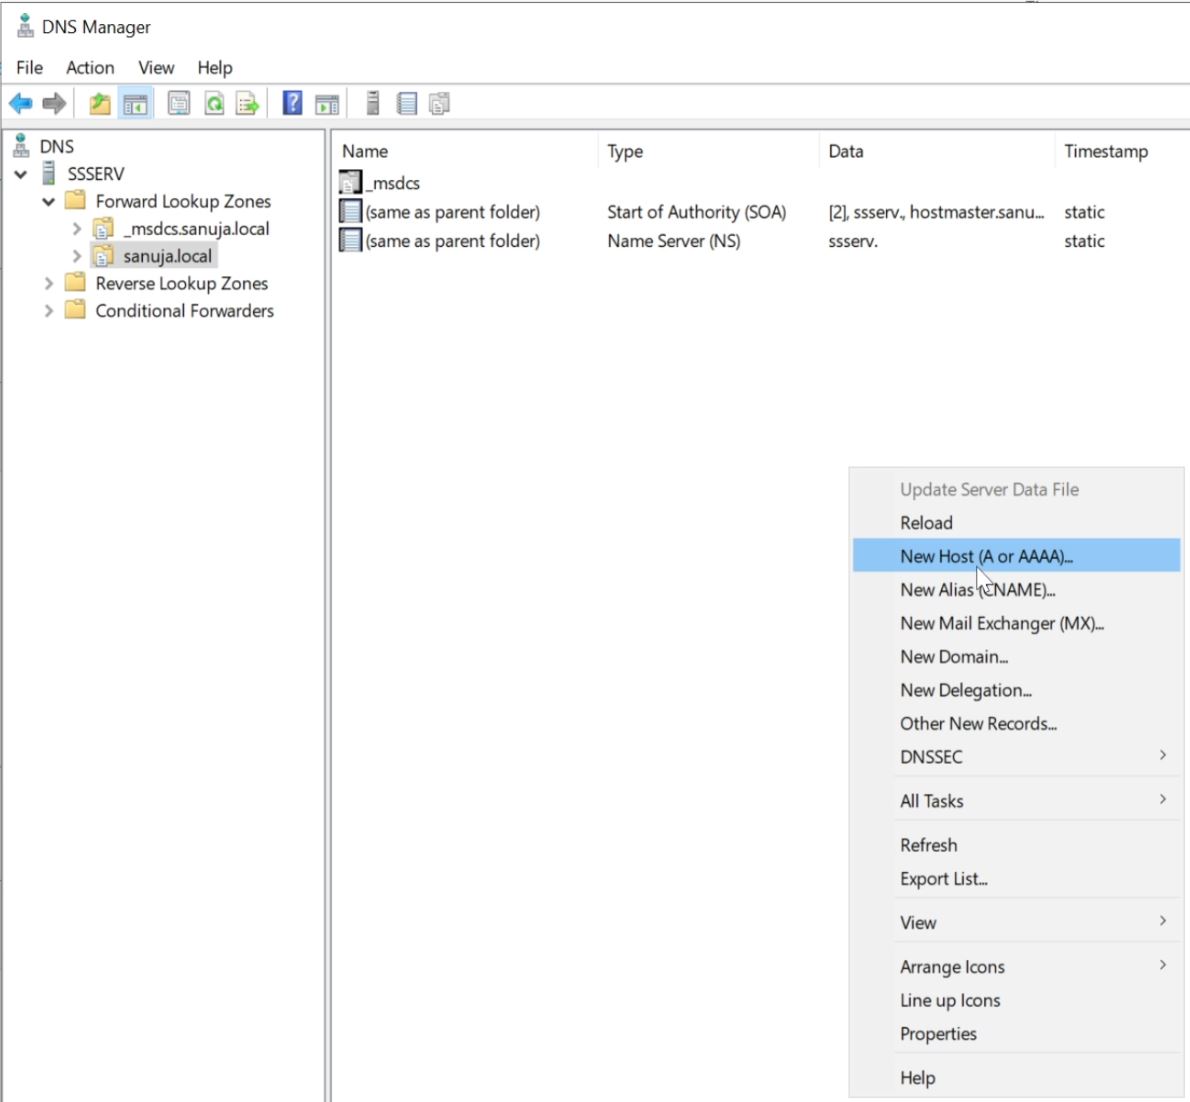
Step 7: On the Windows Server, add a record in the Forward Lookup Zones within the DNS Manager with the details of the Linux machine. Open Server Manager > Tools > DNS Manager.
Expand the Forward Lookup Zones from the left-hand pane and select your domain. In this demonstration it would be sanuja.local. Then right click on a blank space on the right-hand pane and open New Host (A or AAAA)… record.
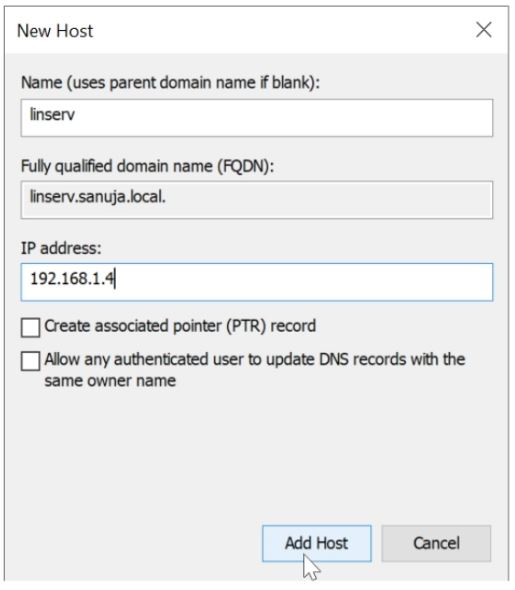
Fill in the New Host record information with the Linux data. For the name, use the Linux hostname without the domain ending. The FQDN should populate with the full hostname with the domain ending (which is the FQDN). Enter the IP address of your Linux machine.
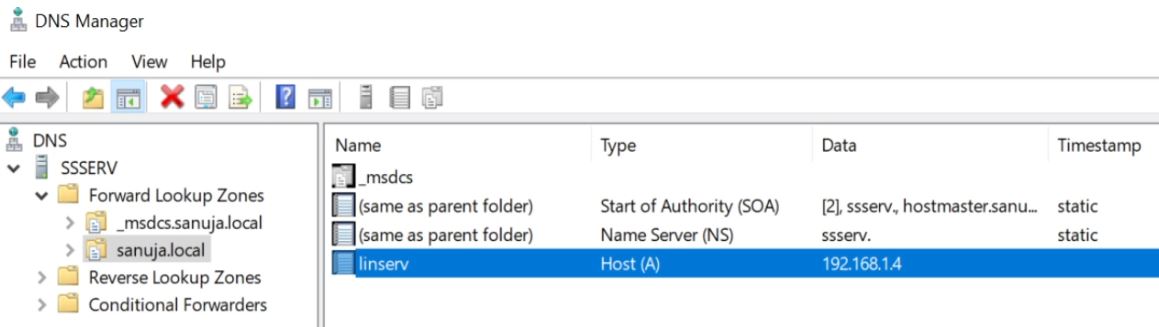
Linux DNS record should now be in the Forward Lookup Zones.
Step 8: Now ping again to Linux machine from the Windows server. This time, ping using the Linux hostnames. For example, linserv and linserv.sanuja.local (as per above DNS record). You should be able to get ICMP ping replies back from the Linux machine.
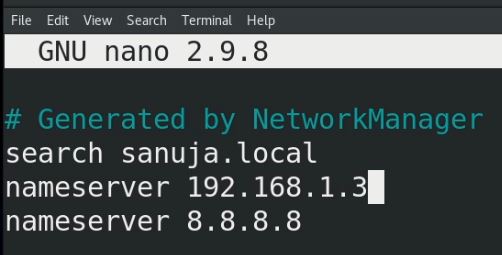
Step 9: On the Linux machine, edit the resolv.conf file so it can be used by the Linux to see the DNS server on the Windows machine. Use the following command to open the reslov.conf file.
nano /etc/resolv.conf
Note, this file is created by the NetworkManager. This means that this file may be overwritten by the system each time you reboot your Linux machine. I will explain how to stop this in a different article/video. But for now, add a new namesever line to resolv.conf. You should already have an entry for your domain name on the first line. You may also have a DNS entry added because of the Network Manager having a DNS. This DNS record is coming from your Linux Network Card configuration. We should change the configuration to point the DNS record to the Windows Server with our domain.
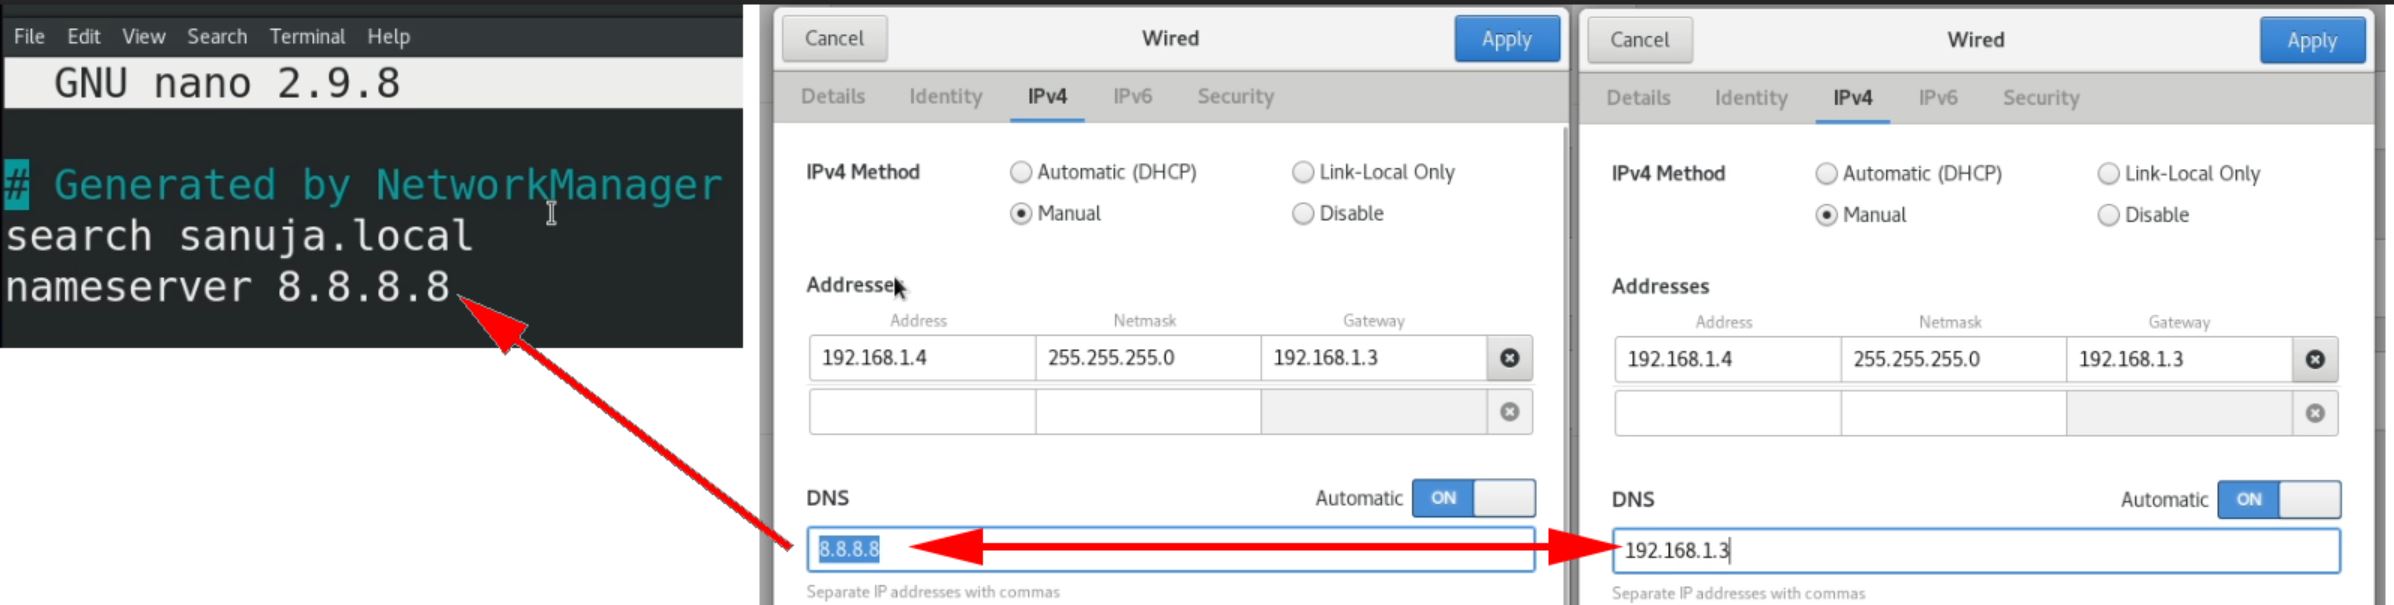
No need to delete the DNS entry already in the file. Instead, just add a new nameserver entry just above it. The Linux will take the first nameserver available when looking for DNS information. Enter your Windows Server IP address with the nameserver entry.
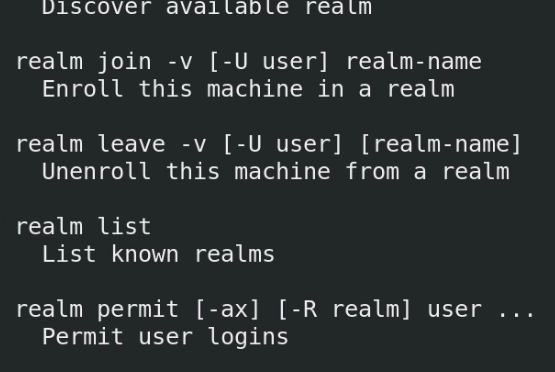
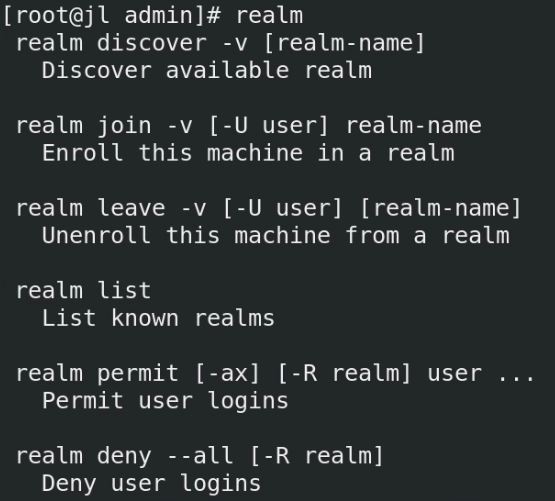
Step 10: Check if the Linux is already on a domain by using the relam list command. Then if there are no record (there should not be), check if your Linux can see the Windows domain by using the command realm discover sanuja.local (your domain instead of sanuja.local). You can check all the commands for joining a domain using realm by typing realm [Enter].
Note: Use the “administrator” user and the password for your Windows Domain during the joining process on the Linux side.
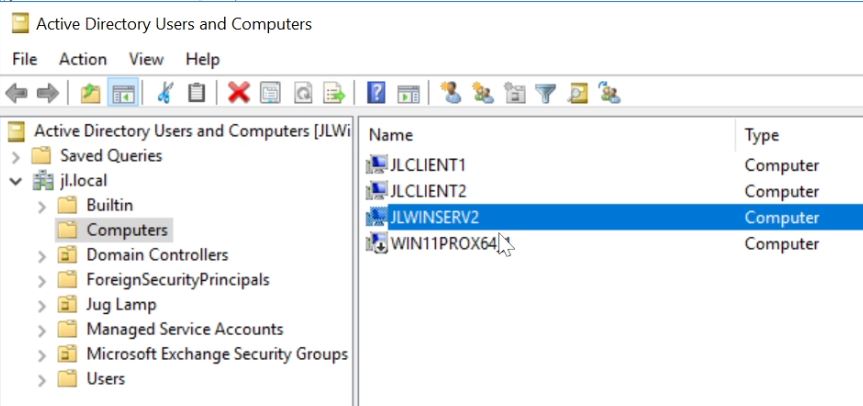
Once you have joined the Windows Domain, your Linux machine should appear under Server Manager > Tools > Active Directory Users and Computers in the Windows Server.