This is a continuation of my previous post Deploy Microsoft Deployment Toolkit (MDT) article. Please make sure to go over the previous article or watch my video tutorial on MTD install and configure covering both parts.
In this article, we will look at the configuration and deployment of MDT. As I have previously mentioned, Microsoft Deployment Toolkit or simply MDT is used in enterprise and business environments to install Windows Operating System (OS) on large number of clients by standardizing and streamlining the Windows deployment process. Once you have installed MDT on your Windows Server, the next step is to configure the features and settings.
Windows Deployment Services (WDS)
After you have installed the necessary components on your server (Windows Assessment and Deployment Kit (Windows ADK), Windows Preinstallation Environment (Windows PE or WinPE), Microsoft Deployment Toolkit (MDT) and Microsoft Deployment Services (WDS) server role) by following my previous article, the next step is to setup or configure these items for MTD.
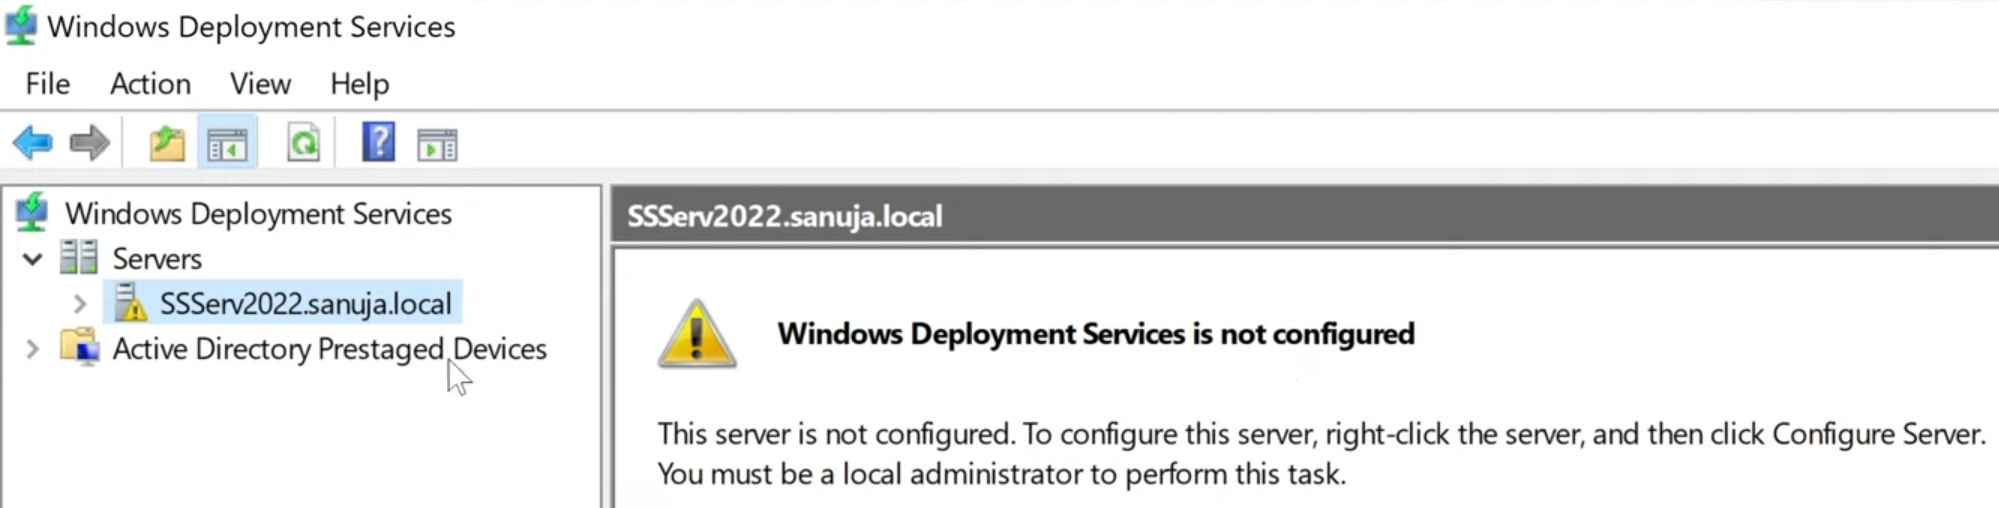
First we will configure Windows Deployment Services. You should be able to find this under Server Manager > Tools menu. On the WDS console, on the left hand pane, expand the Servers tree and you should see your server listed with a yellow warning sign next to it. If you select it, there should be a statement: Windows Deployment Services is not configured.
Right click on the server name on the left hand pane and select Configure Server. It will open the Windows Deployment Services Configuration Wizard. It will list the requirements needed for MDT. I have already covered these items and posted video tutorials on how to install and configure AD DS, DNS, DHCP, etc. on my YouTube channel. Assuming that you have the required services and items already configured on your server, click Next.
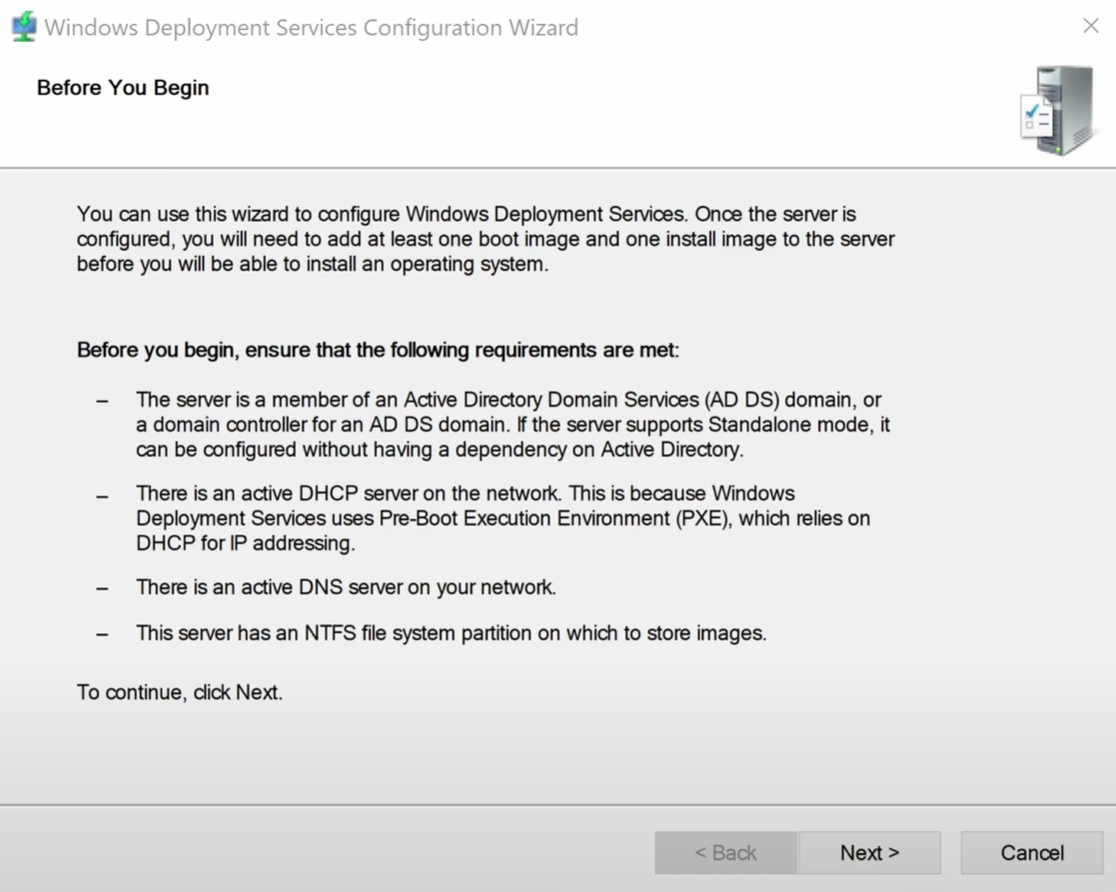
If you do not have these required services/items, please refer to: AD DS installation, DNS installationM/a> and DHCP installation
On the next screen you will have the choice to install WDS integrated with Active Directory (AD) or to install as a standalone server. It is recommended to install with integrated AD as it comes with more features allowing System Administrators to manage large scale and complex deployments by utilizing powerful options within AD DS. You may also select standalone option if you would like to install WDS and eventually do MDT independent of AD DS. Once a selection is made, click Next.
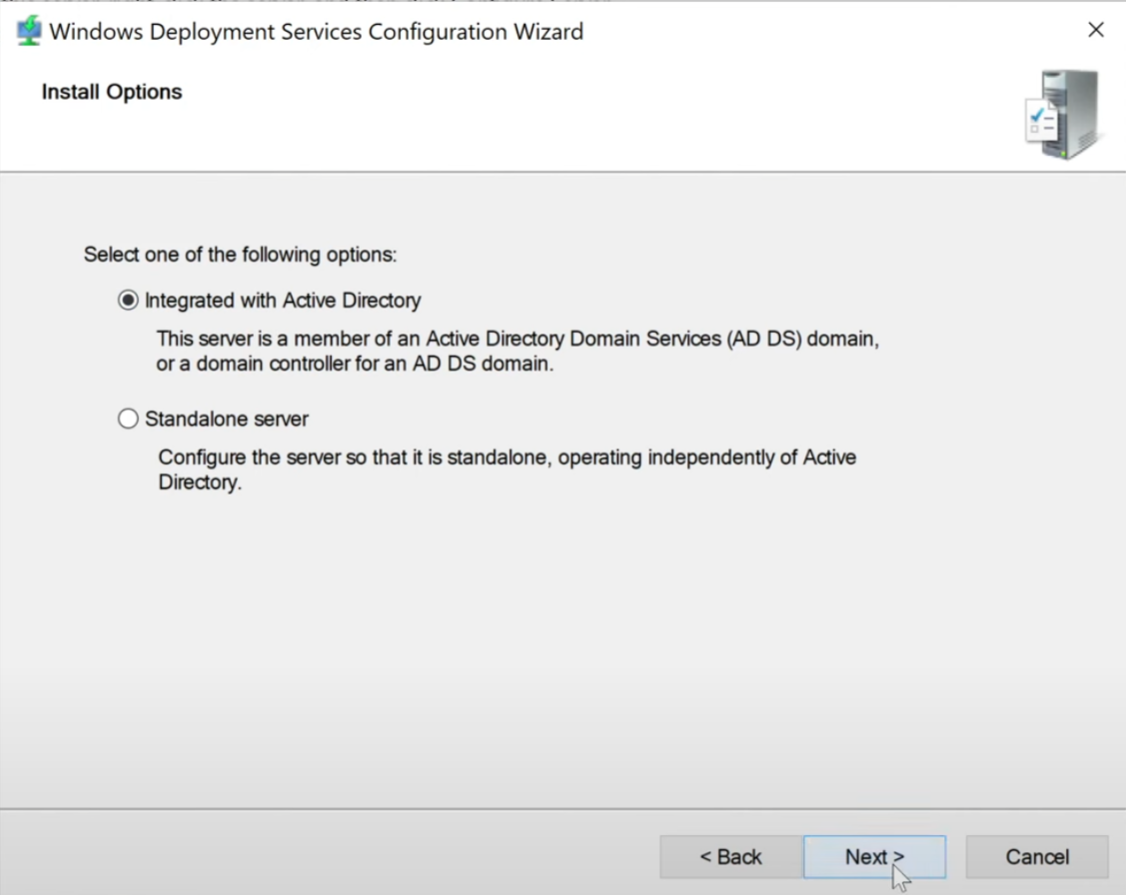
Please note most organizations (companies) would install WDS for MDT with AD DS integration. Check with your organization operating procedures for more information prior to installing WDS.
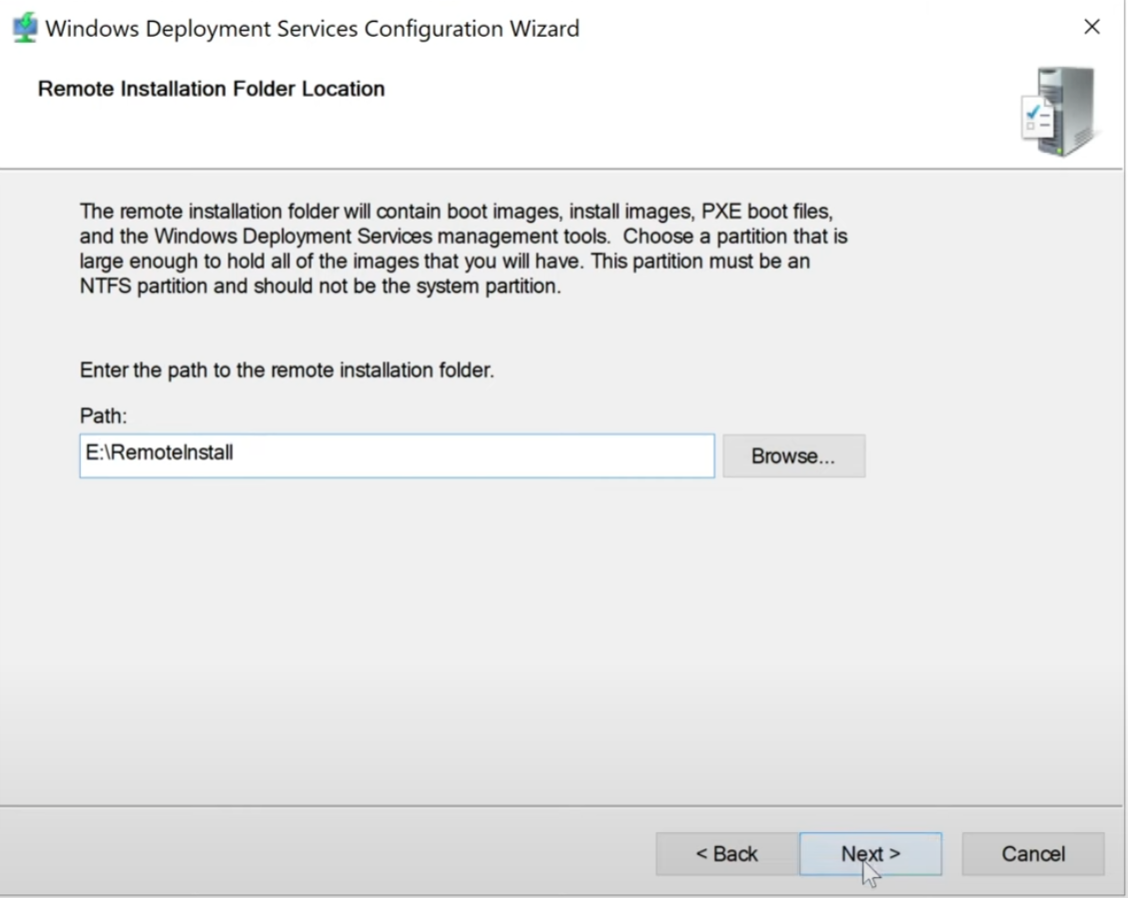
On the next screen, you can choose where WDS will store its files such as boot images, install images, PEX boot files, etc. It is recommended that you use a local drive (local hard drive) or if choosing a network connected drive, select one that is highly reliable and has very high availability. Please note as WDS files will be pulled by the MTD during deployments and network speeds and data access speeds will impact MTD performance. Once a location for WDS files have been selected, click Next.
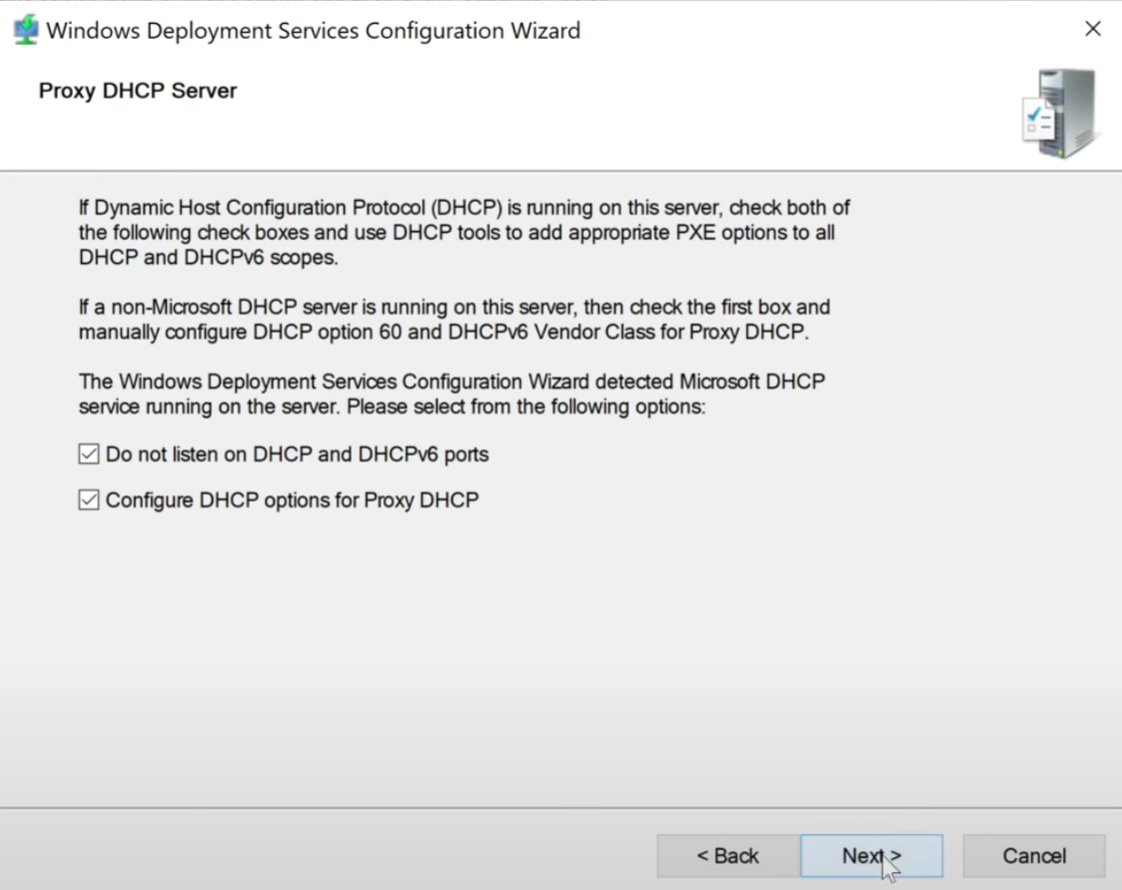
On the Proxy DHCP Server screen, unless you have a specific configuration that requires changes to these default settings, please select the two check boxes for Do not listen on DHCP and DCHPv6 ports and Configure DHCP options for Proxy DHCP. This will automatically set these items as needed for WDS and MDT. Click Next.
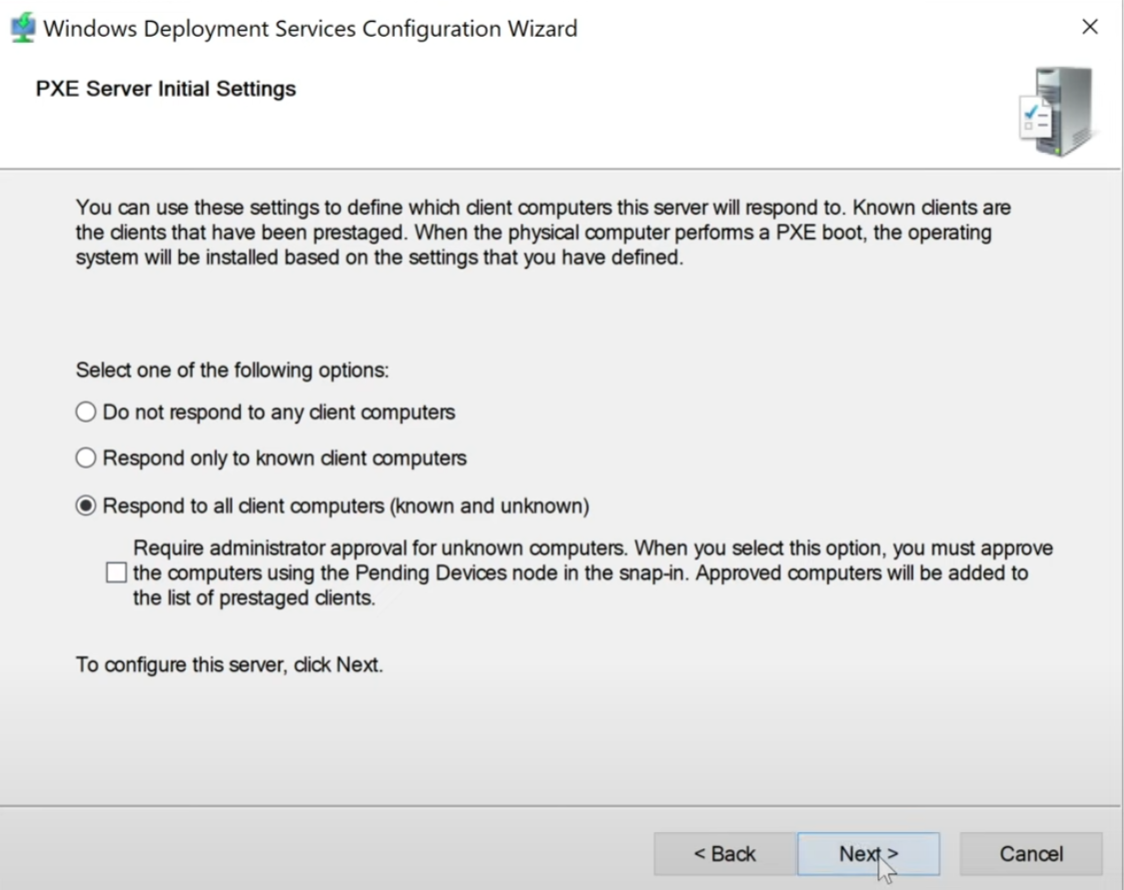
On the PXE Server Initial Settings, if you are in a lab environment or your are within your organization’s private network, it is safe to select “Respond to all client computers (known and unknown)”. However, for cybersecurity best practices, you may also consider selecting “Respond only to known client computers”. Keep in mind if you select known computers, the client devices must be prestaged hence all new clients will need additional configurations.
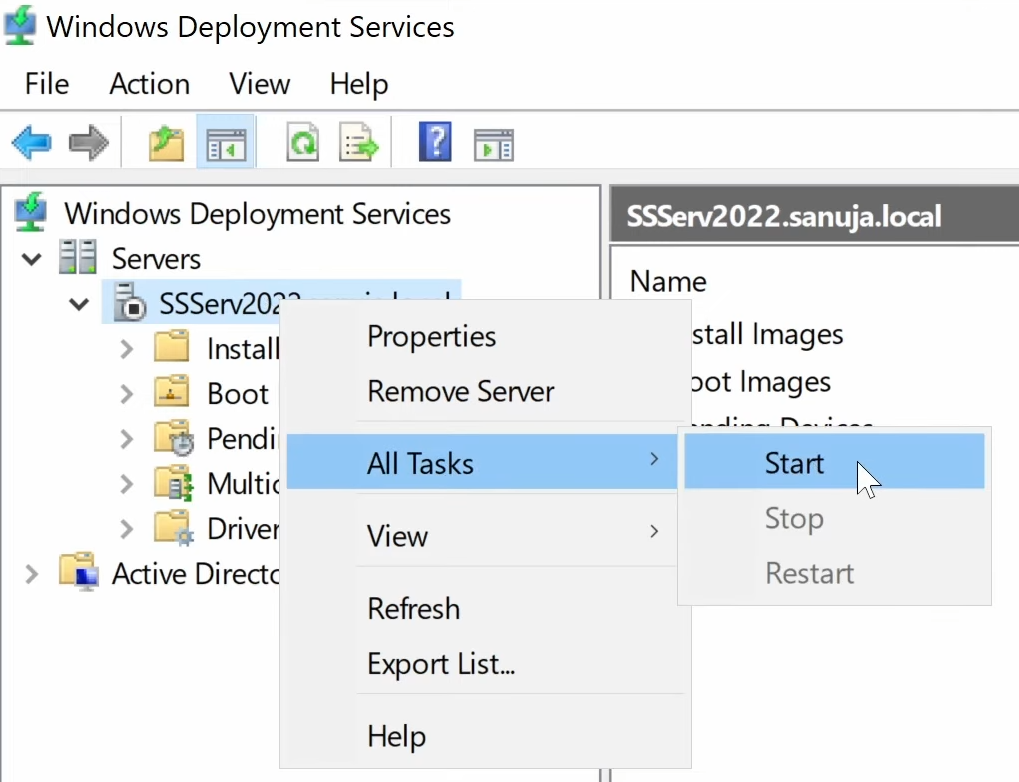
At this point, when you select Next it will start installing and configuring WDS. Once this is done, click Finish to close the window. On the left hand pane, you will see a black square next to the server name. This is because the WDS services are not started. You may now start the services by right clicking the server name, All Tasks > selecting Start.
Configuring MDT
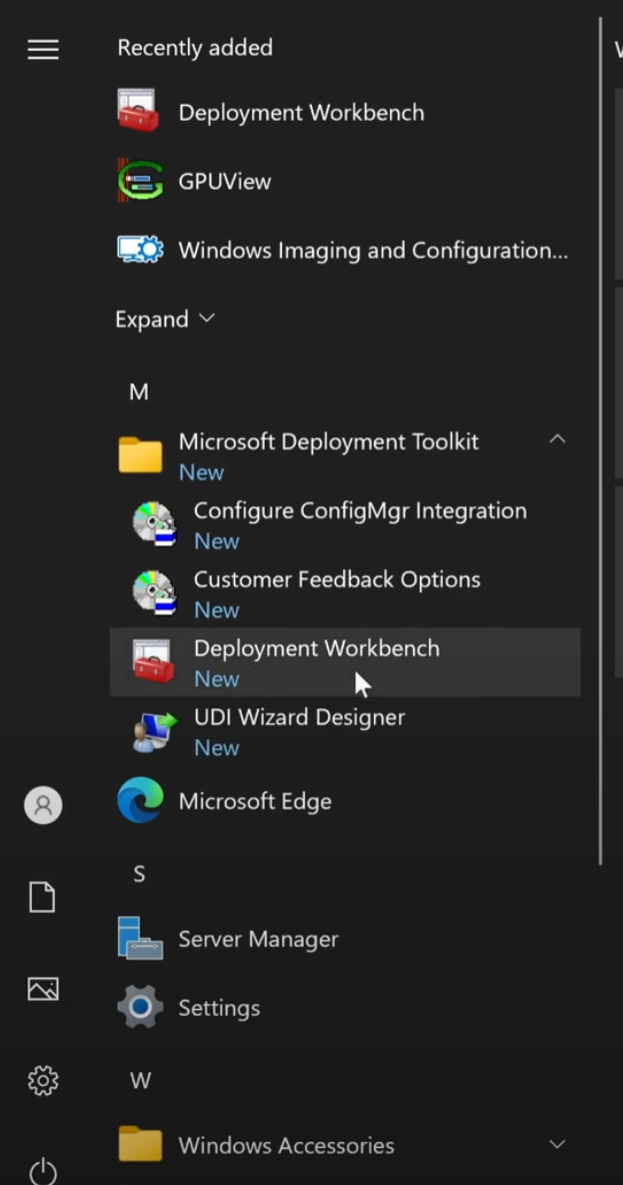
After you have installed WDS, you will find few new items under the Windows menu. We will use the Deployment Workbench under the Microsoft Deployment Toolkit for configuring options for MTD (Start > Microsoft Deployment Toolkit > Deployment Workbench)
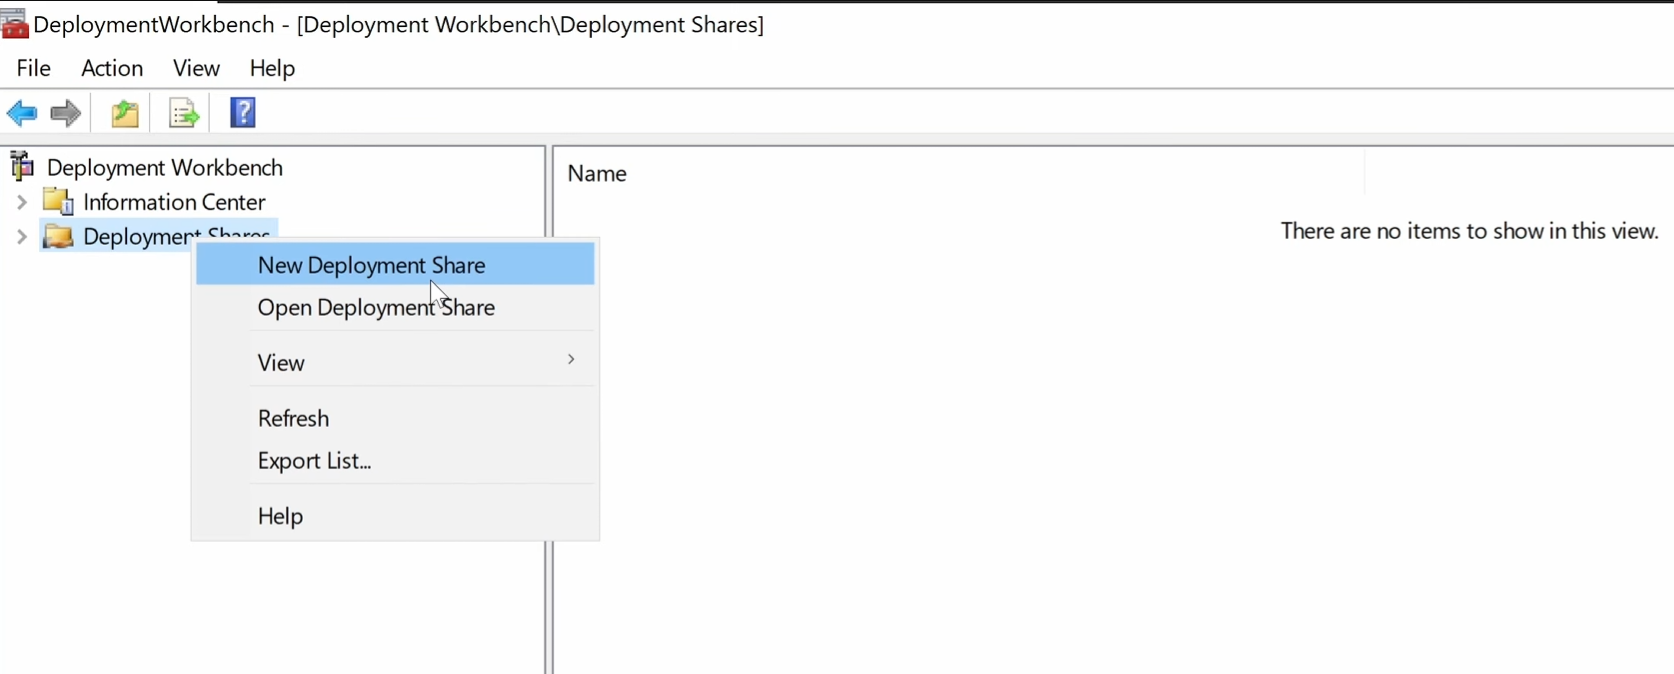
Left hand pane in the Deployment Workbench console, you can select sub-categories; Information Centre and Deployment Share. If you select Deployment share, you should have no items listed on the right hand main pane, assuming this is the first time you opened the Deployment Workbench. To create a new share for MDT, right click on the Deployment Share from the left hand pane and select New Deployment Share.
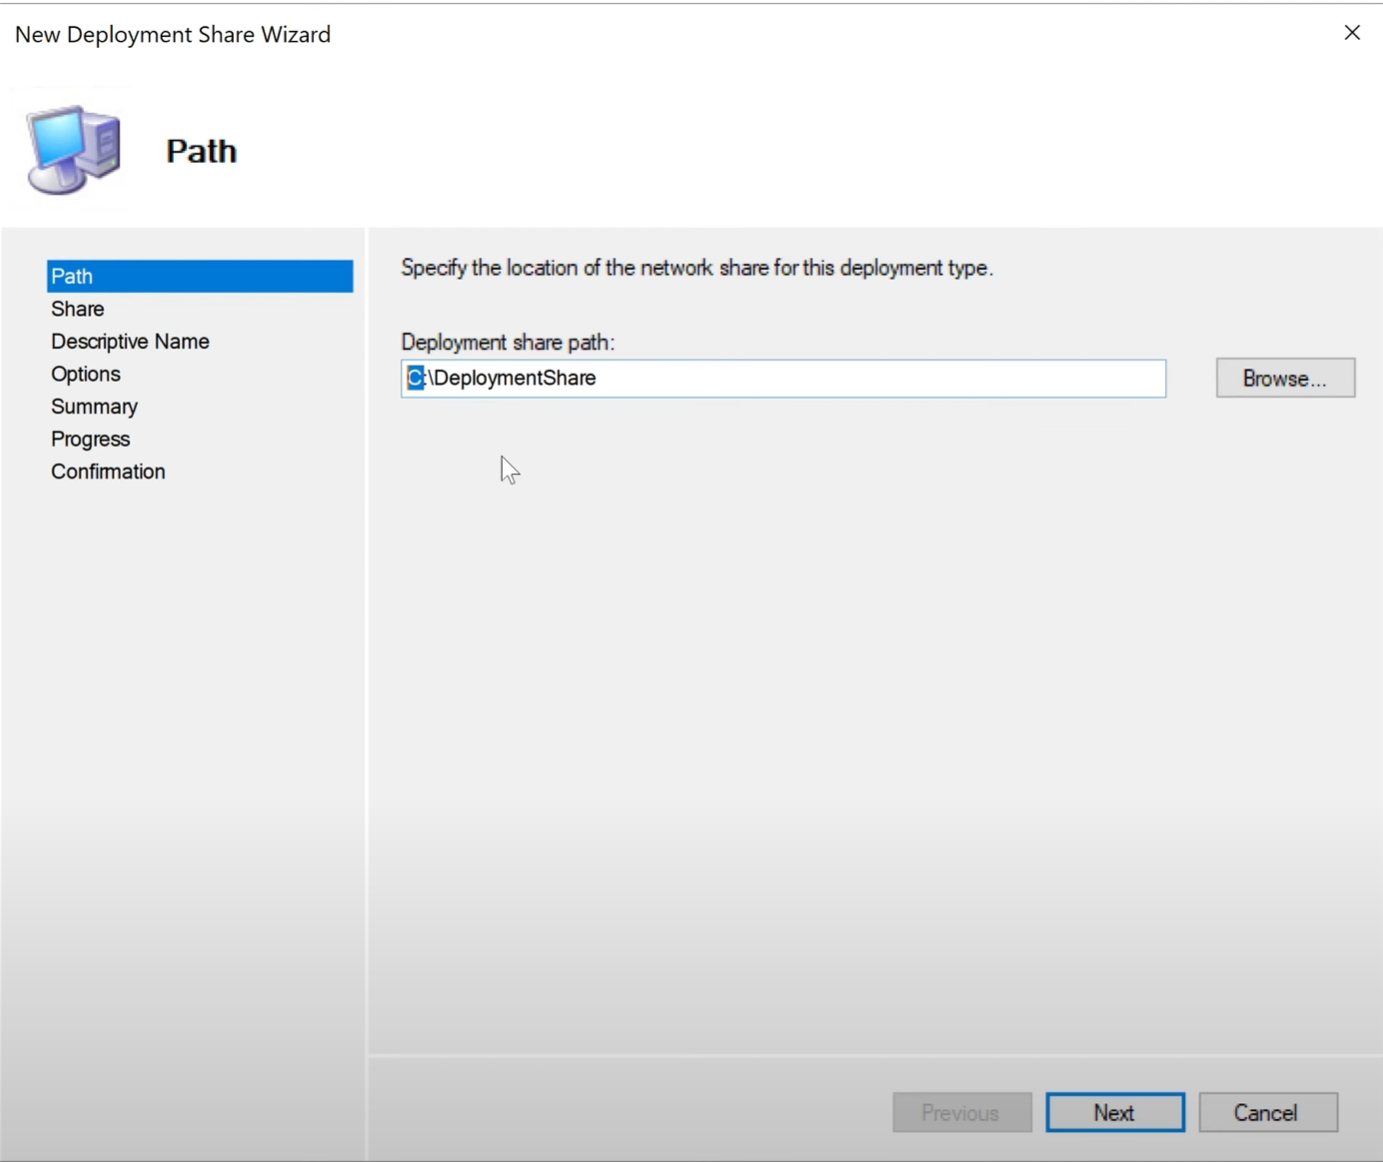
On the New Deployment Share Wizard, you can change the settings according to your organizational IT policies. By default the Deployment share path: will be set to C drive letter. Typically, you would keep these shares outside of your Windows Server C drive and you can modify his parameter under Path section in this wizard. Once this is edited click next.
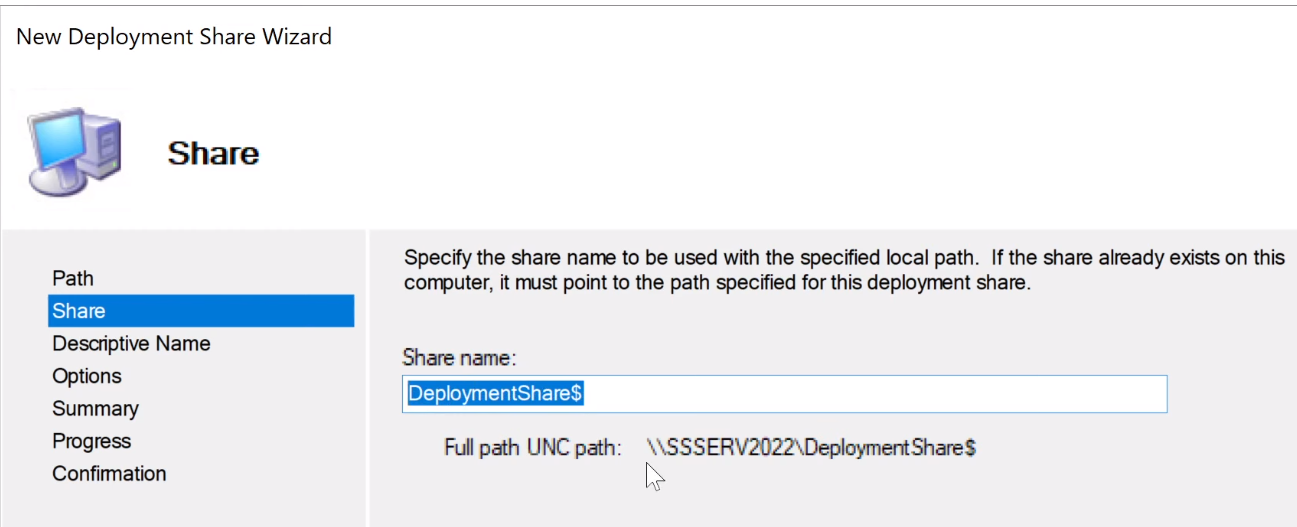
Notice on the next screen, at the end of the share folder name the dollar character; DeploymentShare$. This makes this folder a hidden folder. Under it, the full UNC path, often refereed to as the “network path” should be listed. You can take a note of it but if you don’t, it is \\{YOUR_SERVER_NAME}\{SUB_FOLDERS}\DeploymentShare$.
Next two items are Descriptive Name and Options. You are here reading this article because you are a student or new to Windows Server Administration. For now, just leave everything under those two options as it is in default values and click Next.
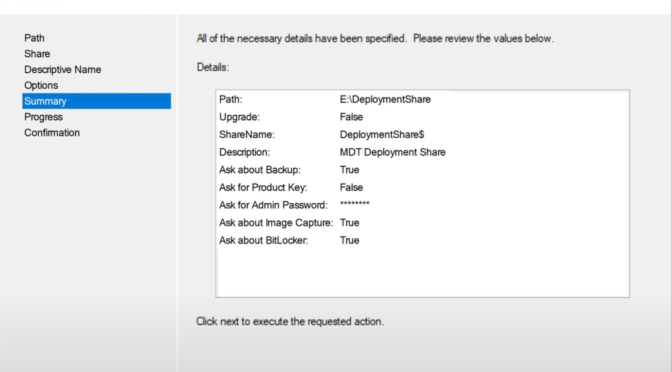
On the Summary page, it will list the details of the configuration options you have selected for specified. Make sure everything looks good and click Next to install.
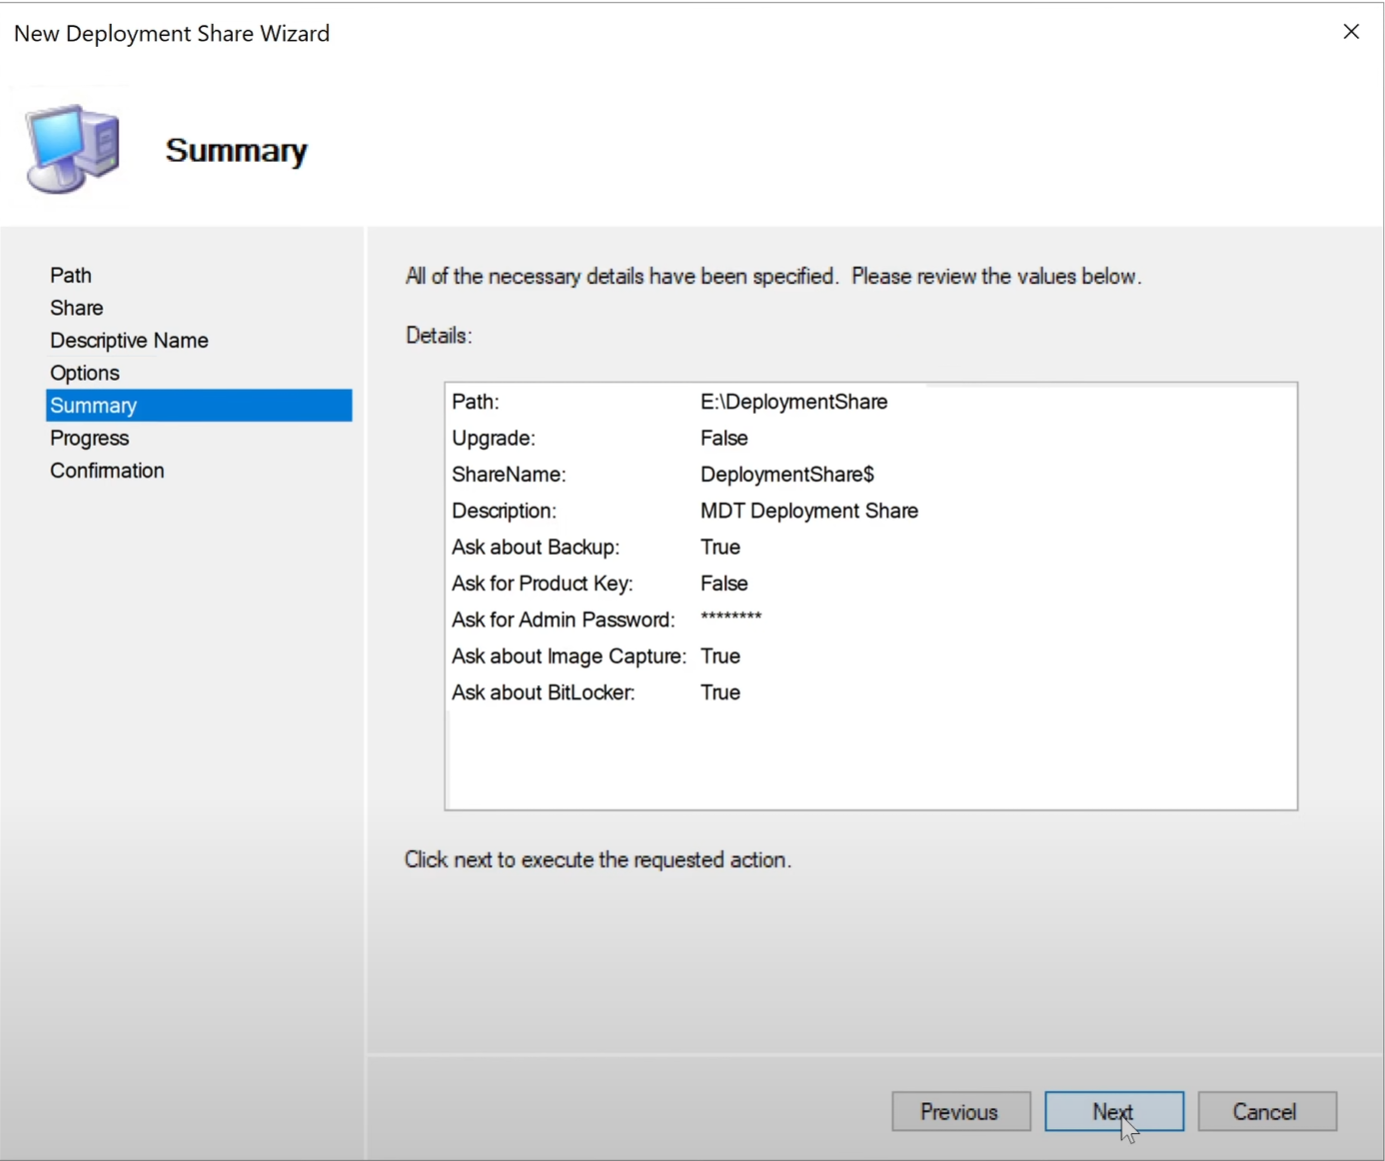
On the Confirmation tab, make sure the message reads: The process completed successfully. Then click Finish to close the wizard.
Now on the left hand pane you will notice a new MTD Deployment Share with location details. When the Deployment Share is selected from the left hand pane, you will also notice the same share listed on the middle pane. If you expand the left hand pane items, you will now have list of items that you can used to customize your MDT share image; Applications, Operating Systems, Out-of-Box Drivers, Packages, Task Sequences, Advanced Configuration and Monitoring

This page will be updated soon. For now, please follow the complete instruction in the following YouTube video. Thank you.