Not everyone knows what is a virtual machine, let along using them. They are used by students and industry professionals to learn, program and test software operations in different platforms. I use them to learn the behaviors of multiple different flavors of operating systems (OS) without using expensive hardware.
In computing there are many methods and processes used for creating these “dummy” environments. I called them “dummy” because when I installed an OS or a program in a virtual environment, I am not actually using separate hardware for my needs. You can install Windows Server 2012, Lubuntu or any version of desktop OS in you desktop computer without deleting any of your files or formatting the main hard drive.
VMware is a company specialized in virtualization software. They have a wide range of products. The VMware Workstation is one of the most basic programs used by non-advanced users. You do not have to be a programmer and/or a geek to use it as long as you can read and understand basic computer instruction!
Basally virtualization software allow any supported OS versions to installed into a folder (directory), which acts and behave as a separate computer, but it uses the exact same hardware as your current unit. VMware have developed programs to act as this middle man for processing I/O (inputs and outputs) to the virtual directory.
You have to buy a copy of VMware Workstation from here or find an evaluation copy and install it in your computer. Follow the instructions on screen, like any other software install. Please keep the default settings if you are unfamiliar with this program.
Choose the OS
VMware provide the platform for virtualization and you can choose from many different OSes to install. I recommend, Lubuntu, which is based on the Open Source OS, Ubuntu. You may download Ubuntu instead, but it requires more resources to run and good for the advanced users. In addition, you may installed any other proprietary software such as Windows 8, as long as you have a valid license.
Mounting the OS
I should have used the word, “mounting” instead of “installing”, because we don’t really install the OS in our machine with VMware. What we do is mounting it (Google it for the difference). Mounting allow to create independent Virtual Machines for each OS. Follow the instructions below for mounting. This is specific to VMware Workstation, but generally most of these instructions can be used for other virtualization programs with little modifications.
First download the preferred OS iso file and either save it in the same same computer in which VMware is installed (recommended) or burn it into a disc (not recommended, read below for why).
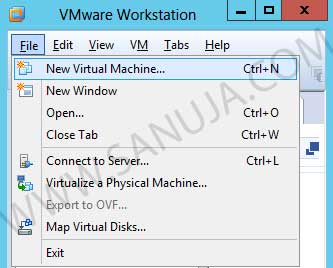
Open VMware and go to File (dropdown) –> chose New Virtual Machine…Adding a new virtual machine.
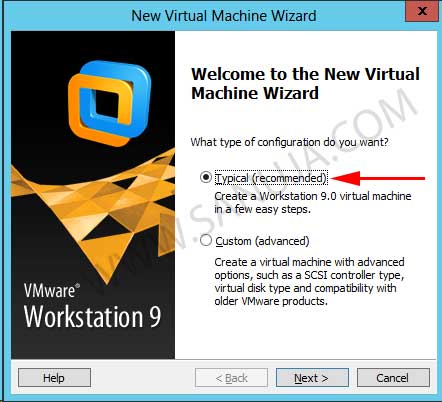
Choose Typical –> press Next >Two paths to install.
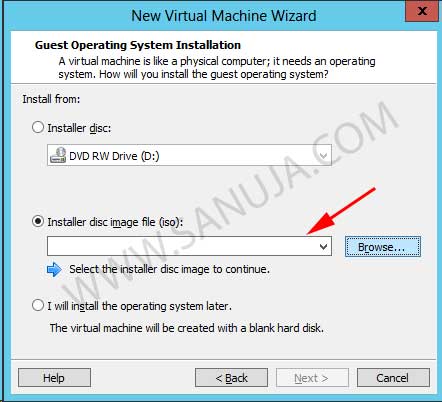
There are two options for the install. I strongly recommend using the iso disc image method. This will not only save you from burning CDs every time you want to install a new OS, but also give you the flexibility of OS updates. The mount media can be updated by replacing the ISO file in the future. It also provide added protection of having the media always in computer.Choosing the downloaded iso file. Click on Browse… and select the downloaded iso file.
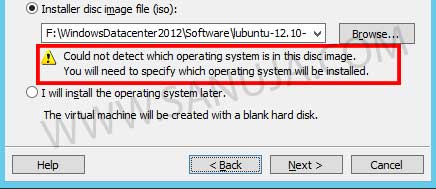
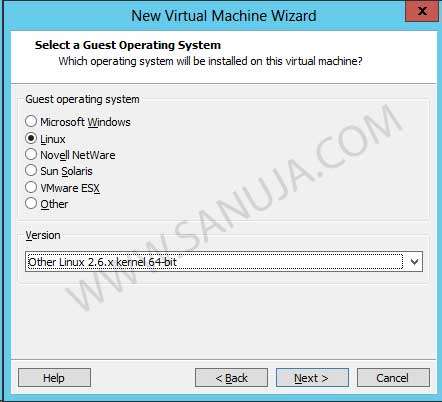
If you choose to mount Lubuntu, you will get this warning message;Warning: Could not detect the OS type. That is perfectly fine. Just click Next > and you will be directed to a new window (see below). Choose Linux for Guest operating system and Other Linux 2.6.x kernel or it’s 64-bit cousin.Guest OS and it’s version. If you have 32-bit ISO file, choose Linux 2.6.x kernel without 64-bit. If you have an older or a newer kernel based ISO file, choose appropriately.
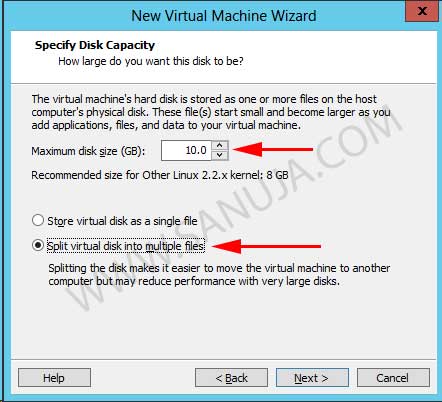
Click Next > and choose whatever the name you want to give your Virtual Machine and the location of the install. I recommend using an SSD location if you have dual hard drives. Click Next > again for Disk Capacity Options.Disk capacity configuration. While the VMware recomonds 8.0 GB for maximum size, if you have lots of space, I recommend using a bit more like 10.0 GB. Yes, splitting is better for most computers under 500 GB hard drives. If you are on an SSD, I would not expect a typical SSD user to have more than 500 GB on their single SSD drive (at the time of this post, 2013).
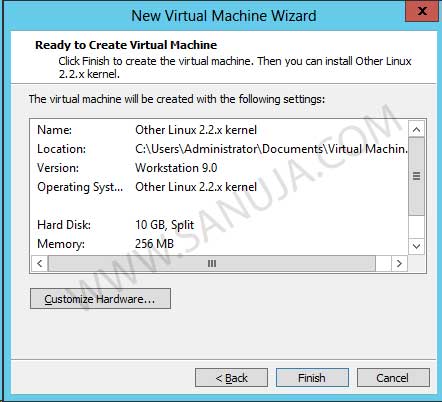
This is the final step in which, a summery of all your configurations will be displayed. Do not open Customize Hardware… unless you are an advanced user.Summery of configurations before install.Click Finish and you are done.
Virtual Machine
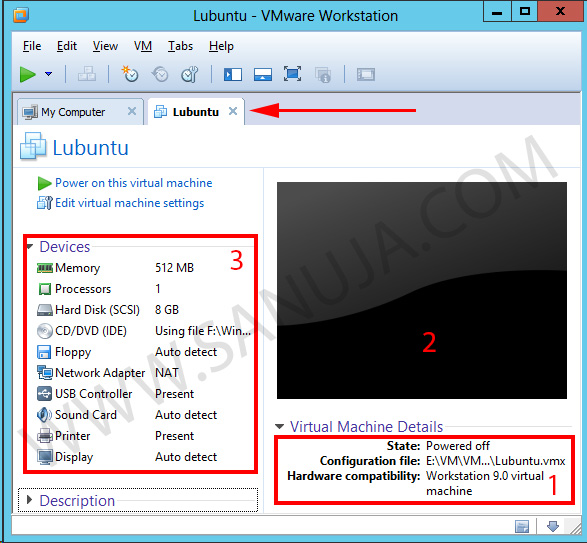
After installation is done, you will see your new VM under My Computer tab. You may install several VMs on a single computer. All your VMs will be listed under My Computer tab. The status of the newly installed VM should read “Powered off” and double click to open it.VM open tab.You will be directed to a new tab with operational information (see above).
There are few important things in this tab. Please refer to the figure above;
1. VM Details: Useful when troubleshooting errors.
2. Window: Indicates the current state of the VM.
3. Devices: Provide a lot of valuable information on the entire VM. You can double click on any of the items to modify the machine settings.
You can now use the Power on (green “Play”) button to turn on the VM.
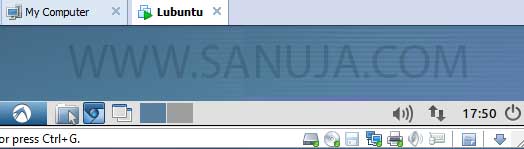
My Lubuntu VM on a Windows unit.
Termination Options
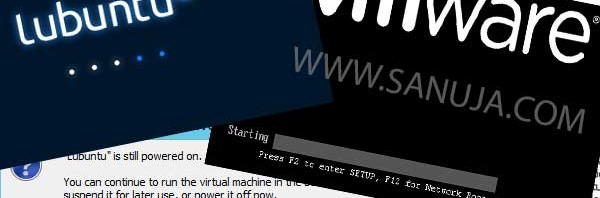
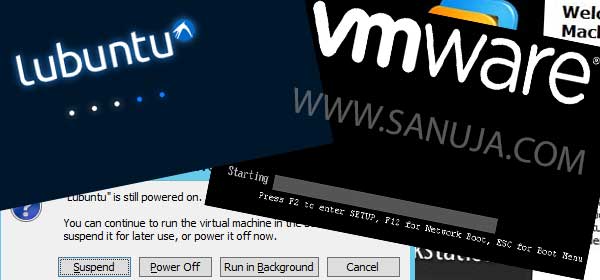
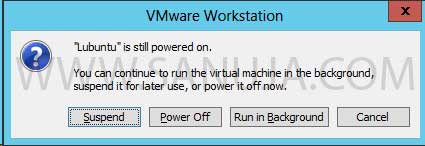
Do not get confused by the power down options when leaving a VM. These options are there to help you.Power down options popup window.
Suspend: VM will keep track of your last operation but will terminate all the processes. It is similar to hibernation or sleep function on Windows computers. You will not lose your data and yet the allocated memory for the VM will be free for other processes (no background runs).
Power Off: Completely shut down the VM. If you have any opened files, all the modifications will be lost. This is equivalent to normal shutdown of a physical computer.
Run in Background: VM will continue to it’s operations in the background. Use this options for installing updates in the VM OS but it will consume memory in your main computer.
I use cookies to optimize site functionality and improve your experience. By continuing to use this site, you accept the use of cookies stated under Privacy Policy and Terms of Use. Read MoreACCEPT
Cookies
Privacy Overview
This website uses cookies to improve your experience while you navigate through the website. Out of these cookies, the cookies that are categorized as necessary are stored on your browser as they are essential for the working of basic functionalities of the website. We also use third-party cookies that help us analyze and understand how you use this website. These cookies will be stored in your browser only with your consent. You also have the option to opt-out of these cookies. But opting out of some of these cookies may have an effect on your browsing experience.
Necessary cookies are absolutely essential for the website to function properly. This category only includes cookies that ensures basic functionalities and security features of the website. These cookies do not store any personal information.
 Not everyone knows what is a virtual machine, let along using them. They are used by students and industry professionals to learn, program and test software operations in different platforms. I use them to learn the behaviors of multiple different flavors of operating systems (OS) without using expensive hardware.


One thought on “VMware Workstation setup”
Comments are closed.