This will be an introduction or getting started guide to pfSense. The pfSense is an open-source firewall and router software application written based on Linux FreeBSD. It can be installed on a physical or a virtual machine (VM) environment. It has all the powerful features of Cisco, IBM of other proprietary firewall appliance developers. Additional features can be added by installing third-party packages (add-ons, plugins) to the pfSense. It is one of the most compressive industrial and enterprise grades open-source firewalls. You may install this application in your home environment for advanced firewall and routing configurations.
This guide will not try to repeat what has been already published by Netgate Docs. This guide will add additional information and value to official documentation. Please follow the external links for additional information.
Warning!
I do not take responsibility for bricked or damaged network and information technology infrastructure as a result of using this guide. It is recommended to test final configuration prior to deployment.Hardware Recommendation
You may install pfSense on either on a dedicated hardware or on a virtual machine (VM). If you are installing on a dedicated hardware, please make sure you at least meet the minimum requirements.
Best Hardware Choices
I would recommend using a processor that supports advanced Encryption Standard instruction set such as Intel AES-NI. This will increase the performance of VPN (virtual private networks).
For network card (NIC), I would recommend Intel Gigabit network cards because it supports FreeBSD allowing offloading network processing to the Intel card. You should have at least two available gigabit or higher network ports. For long term projects, I recommend having at least two ports that supports fiber optic 10GBASE-LX4, 10GBASE-ER or 10GBASE-SR.
Only a 4 GB of hard drive (HD) is more than enough to install pfSense and few third-party packages for routing and firewall. If you are planning to install several packages to increase the capabilities of the system, you should have a larger hard drive. For firewall packet capture and data logging (local), you also need more hard drive space. You may save the data logging on a network drive but it may degrade the performance. Old school hard drives are very cheap and for pfSense, using a solid-state drive (SSD) have very little impact on performance. I would recommend using a hard drive with at least 120 GB of space.
Depending on where this will be deployed, the power consumption should be taking into consideration. Remember the system will be running 24/7 as a network appliance. Operating a dedicated over the counter firewall typically draw very little power (so are routers, switches, etc). I would highly recommend using a system that consume very little power. For example, using a gaming machine to install pfSense stand-alone (not as a VM) is very inefficient. Alternatively, you may purchase a low power consuming Firewall Micro Appliance from eBay or Amazon. This however may limit your hardware capabilities and completely eliminate the hardware scalability.
You may use any 5-10 years old systems. You should be able to run pfSense with no major hardware limitations as long as you follow above recommendations. I would warn you against installing a firewall as a VM in the same system as all other applications such as network attached storage (NAS), Microsoft AD-DS, etc. I prefer stand-alone firewall applications because this would make troubleshooting issues easier.
Installing pfSense
You may also follow the instructions in the YouTube video. The step-by-step written instructions posted here have more detail. The video does not cover web GUI.
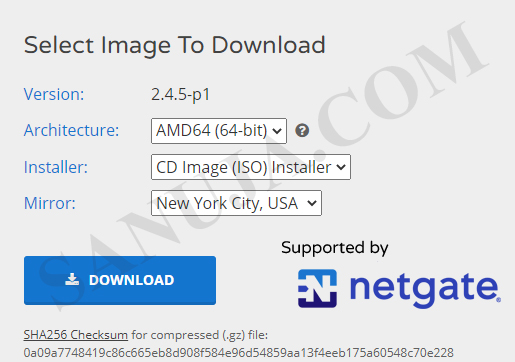
1. Download the pfSense Community Edition stable version from pfsense.org. Select the AMD64 for the architecture type and the installer media of your choice.
2. Extract the .iso file from .gz file and load it on to a bootable CD/DVD or USB drive. You may use 7-Zip program to open the .gz file. If you are installing as a VM, you can follow basic instructions on VMWare setup explained here. An extensive LAN setting for pfSense on VMs will be covered in a future article.
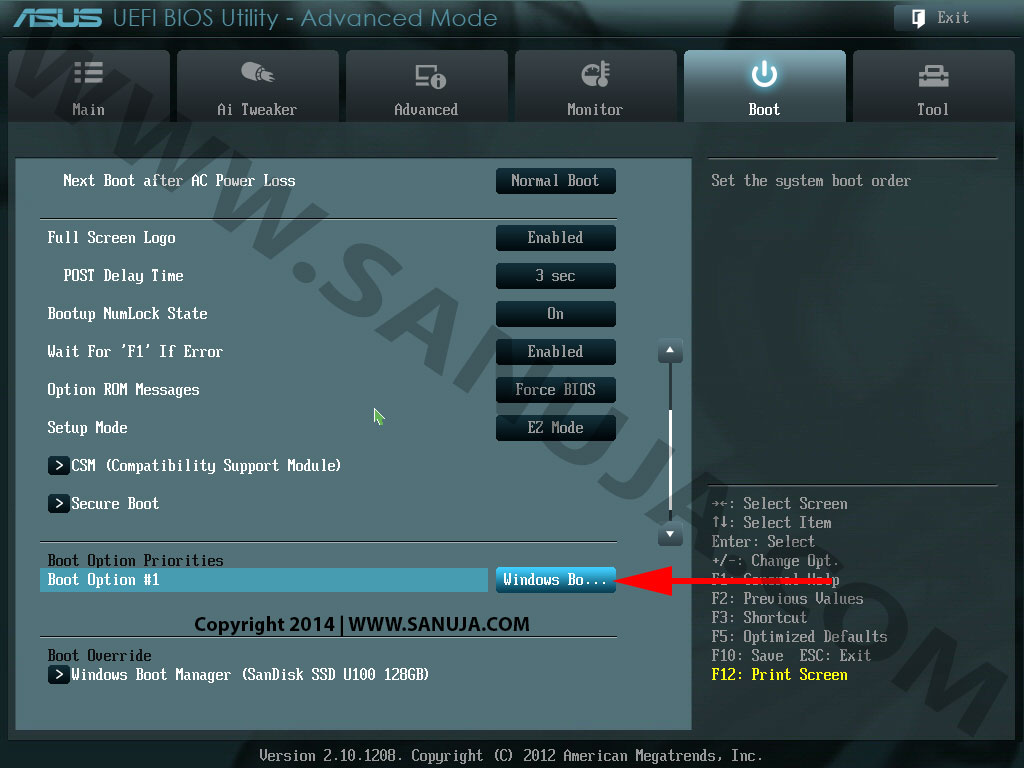
3. Make sure the bootable CD/DVD drive or USB is setup to load correctly on your BIOS/UEFI. The settings for BIOS/UEFI may varies based on manufacture. Here is an example of Asus UEFI boot order update.
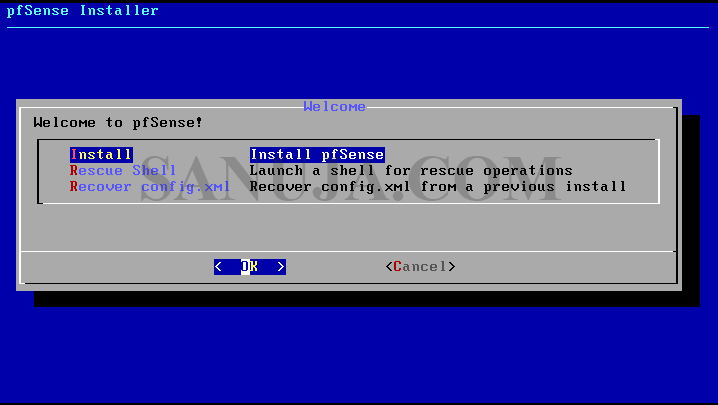
4. Power on the machine with the bootable pfSense media. Follow the instructions based on your BISO/UEFI to boot from the media. You should be greeted with the following screen.
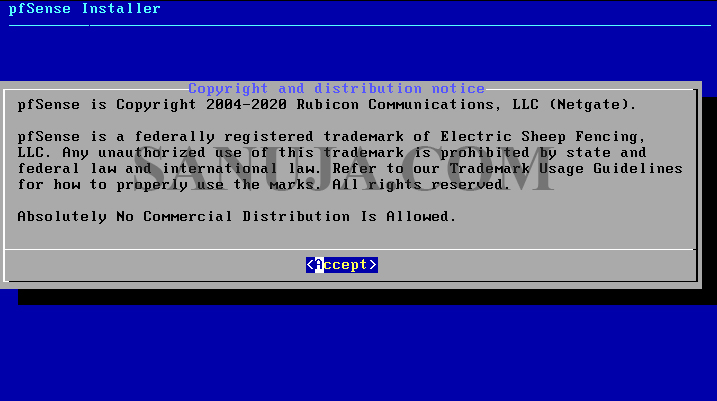
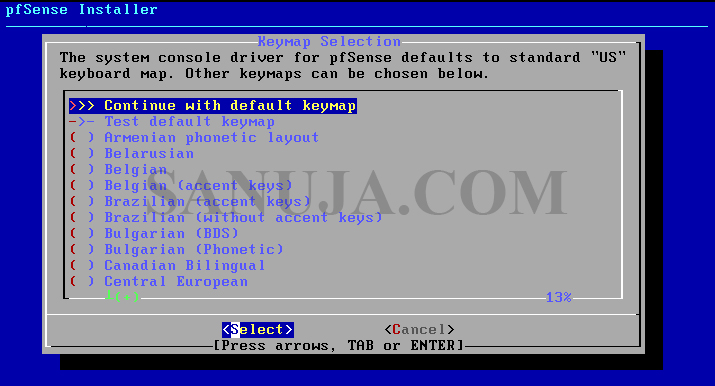
5. Accept to continue, select Install pfSense and select keyboard configuration on next two screens.
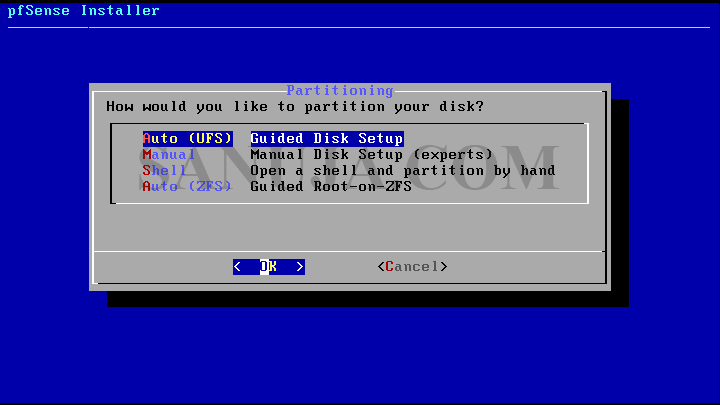
6. Select Guided Disk Setup. We will stay away from the other options for now.
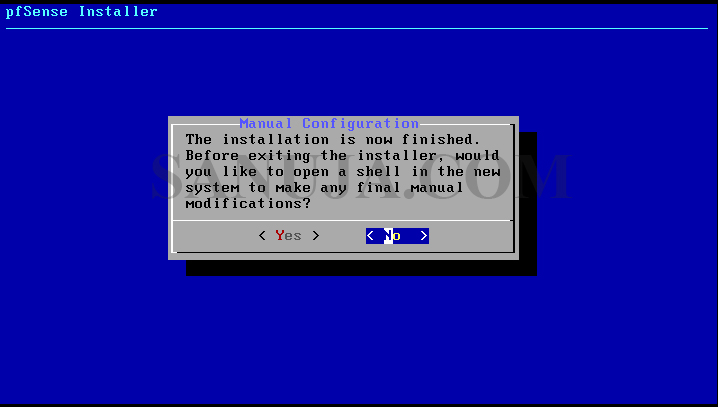
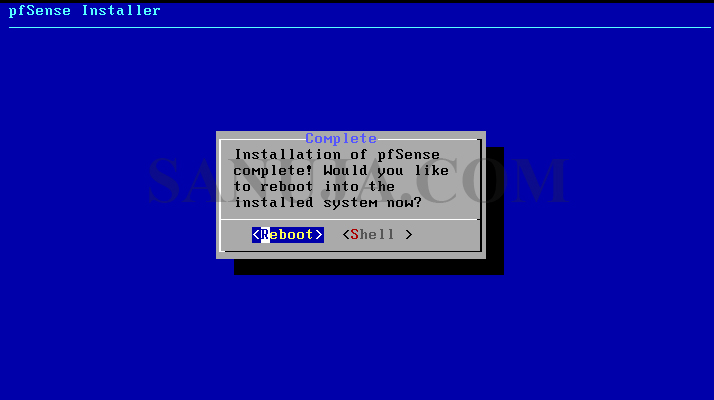
7. Select No for manual configuration and Reboot on the next screen.
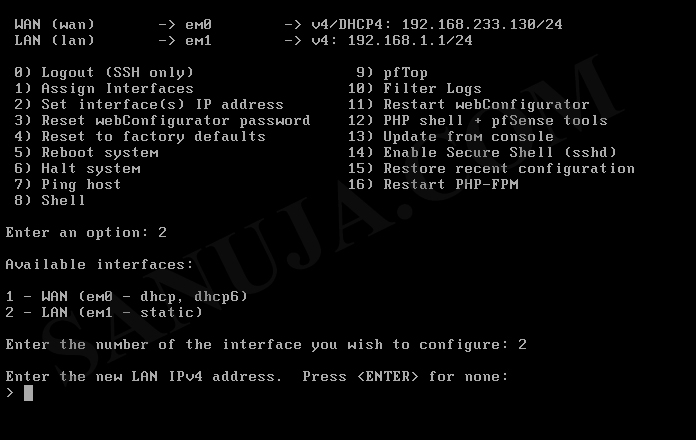
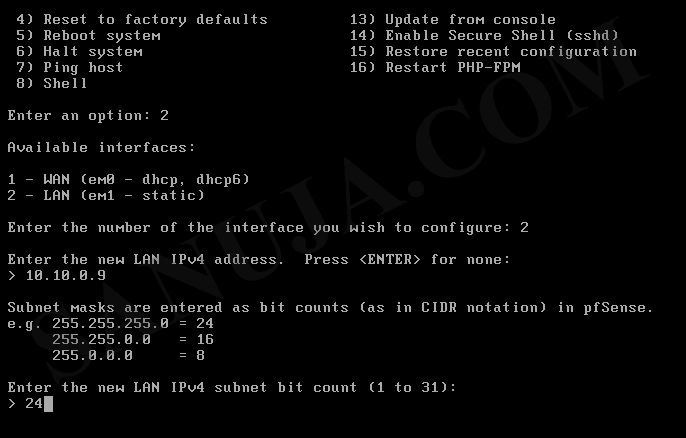
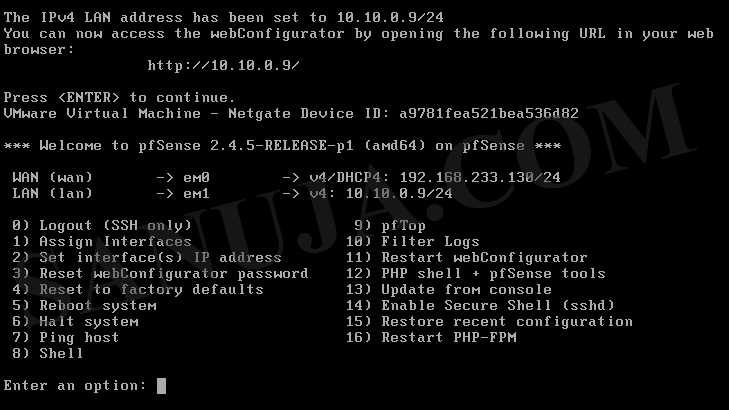
8. After the reboot, you should have the following screen. Please note, pfSense is a headless server with no graphical user interface (GUI). Instead it has a user-friendly web GUI (web interface). You can access the web GUI from another terminal on the same network by using the LAN IP address of the pfSense. In this example, it would be 192.168.1.1. It is a static IP address by default.
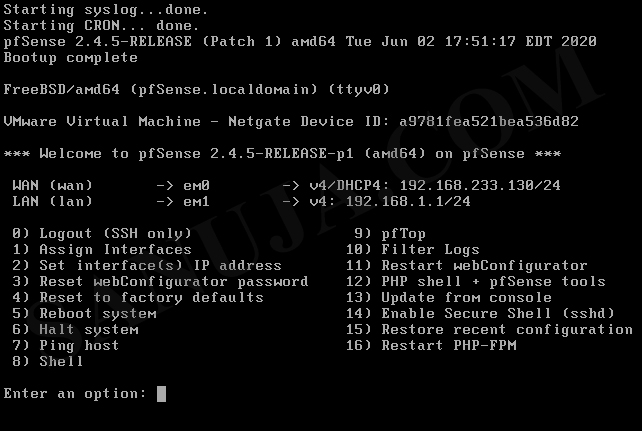
If you would like to manually configure the IP address of the web GUI (on LAN port), select option #2 and LAN interface (in this example #2), then enter the static IP address of your choice and the subnet.
Web Management Interface
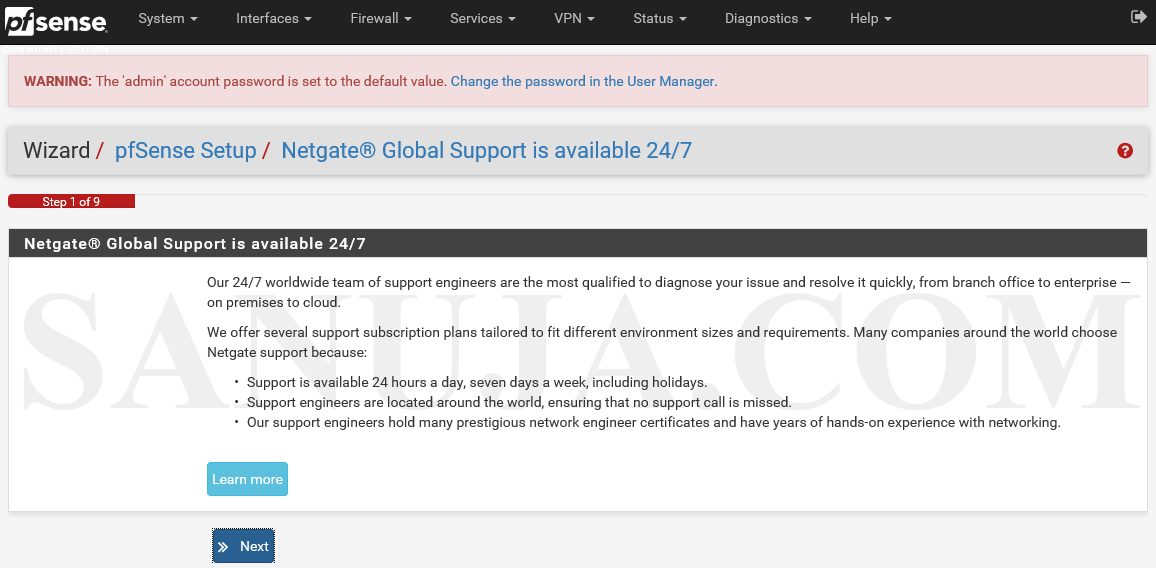
You may also follow the instructions in the YouTube video for Web GUI initial setup. The step-by-step written instructions posted here have more detail.
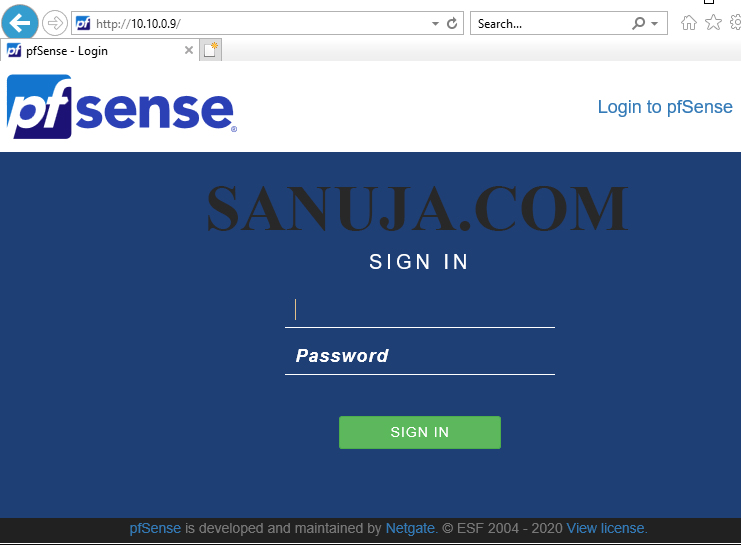
Once the installation is successful, use the IP address for the web interface (web GUI). The following login page will appear. Default username as of today (2020 December) is admin and the password is pfSense.
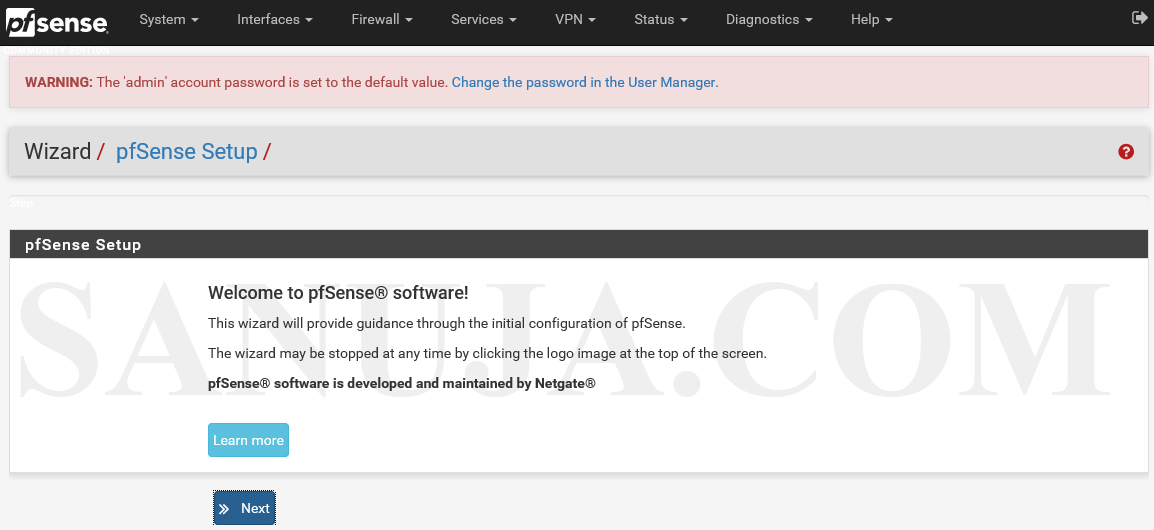
Follow the instructions appear on screen.
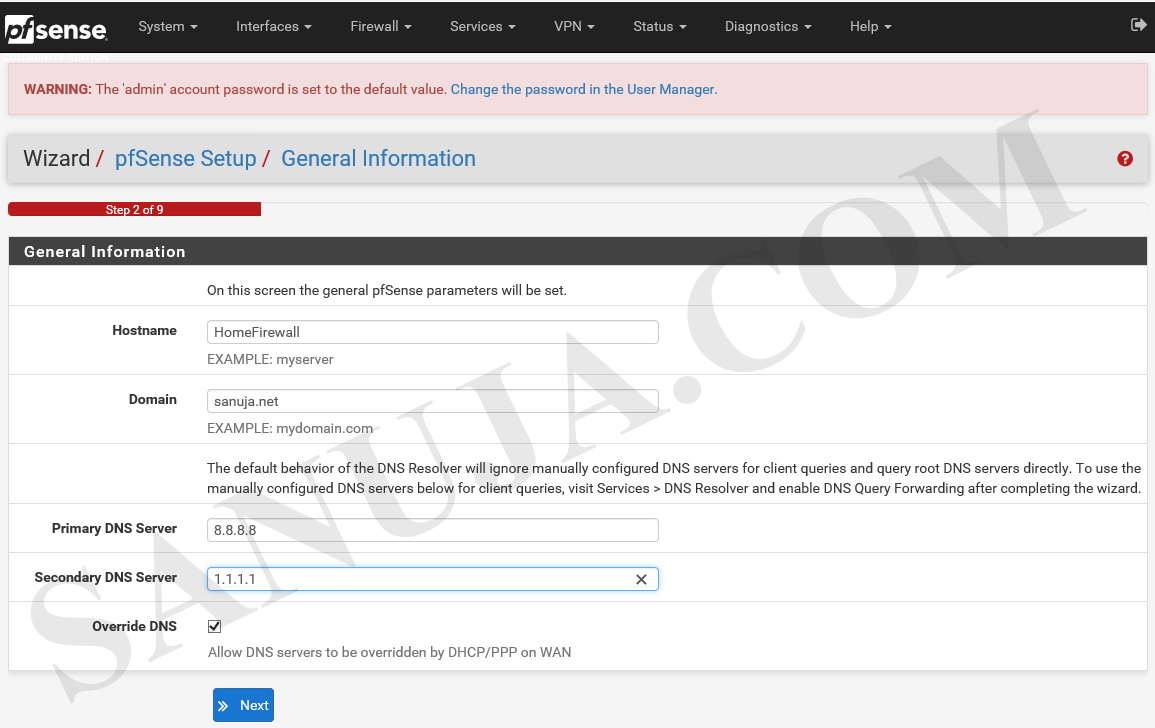
Update the Hostname and if you do not have a Domain, use default localdomain. You may use public DNS servers. In this example, you see the Google 8.8.8.8 and Cloudflare 1.1.1.1 is setup as the DNS servers. Select override DNS to allow forced DNS configuration from pfSense to pushed on to the network.
Select the Time Server Information. It is vital for some authentication services and VPN services that the time is correctly configured. Incorrect time data may result in network issues.

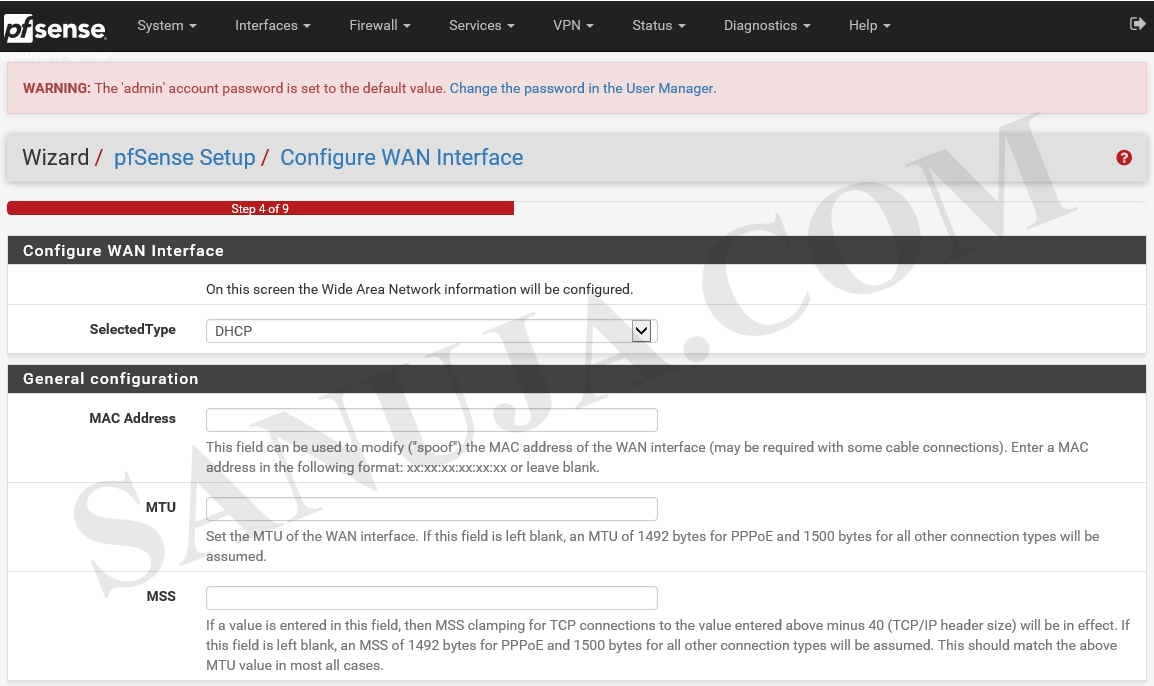
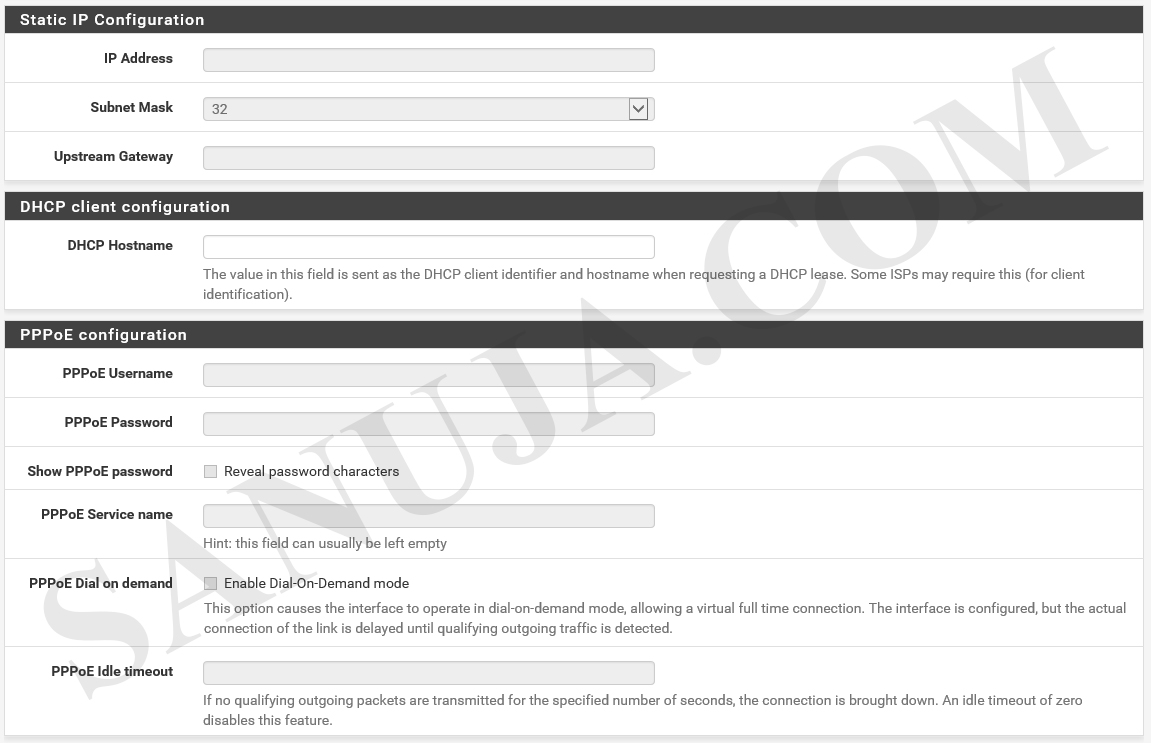
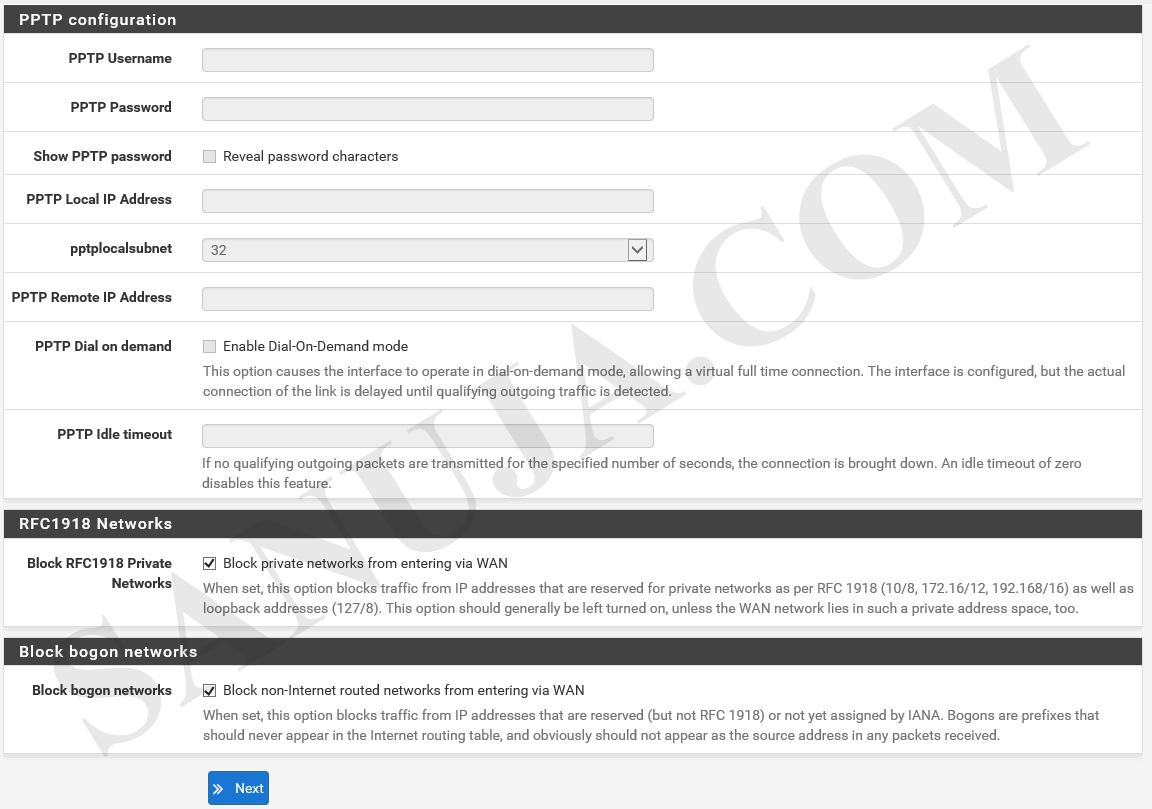
If you are not familiar with configuring WAN interfaces, please leave the default configurations and click Next.
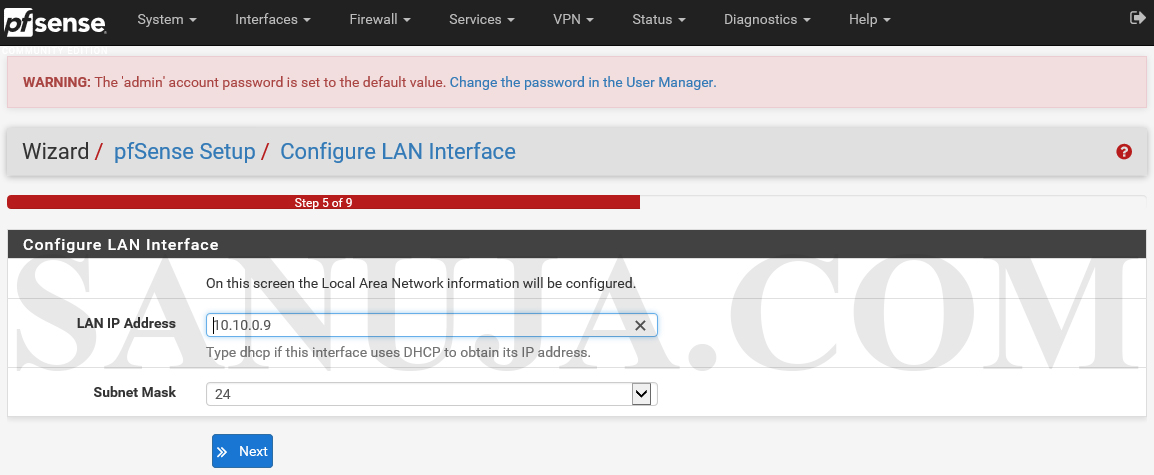
Leave the default for LAN interface configurations if you are not familiar and click Next.
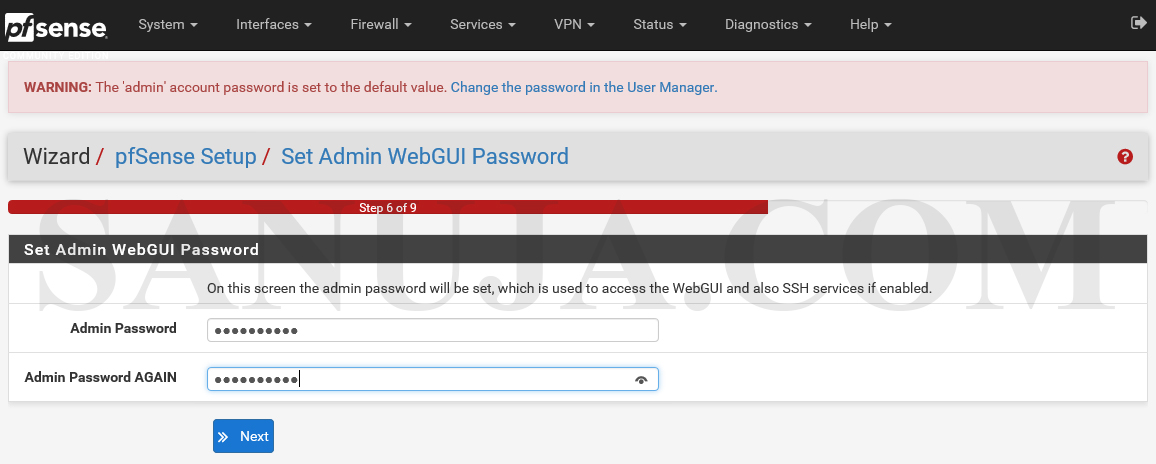
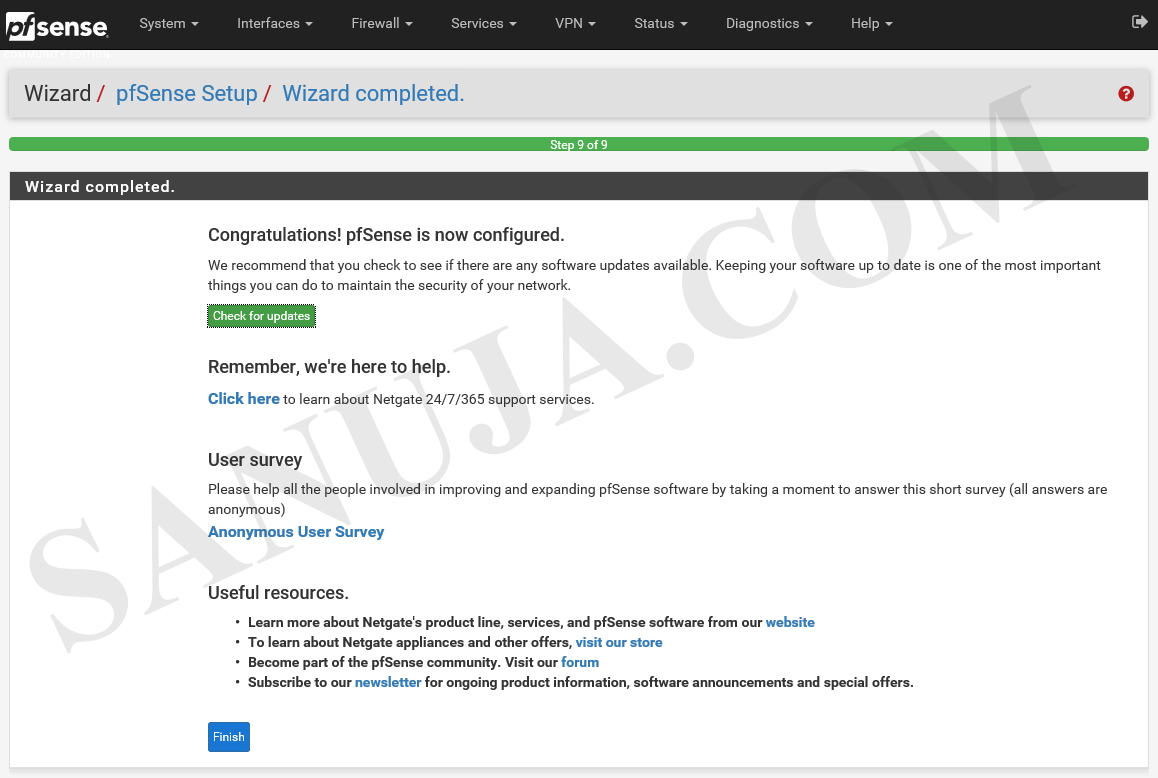
Change the admin password and complete the final steps of configuration by reloading pfSense.
Reload: Note this will reload the pfSense not just the web GUI.
Notice
Do not power down the pfSense machine during reload. It may result in software corruption. After the reload, wait for the WebGUI to load back up. If it failed to load back up, try rebooting the server.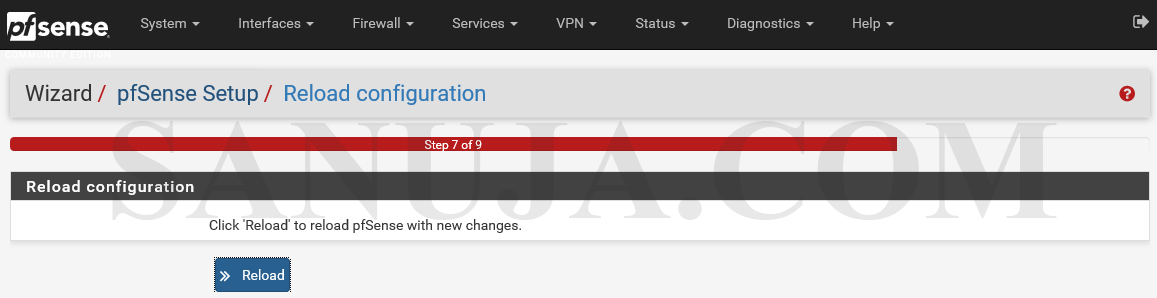
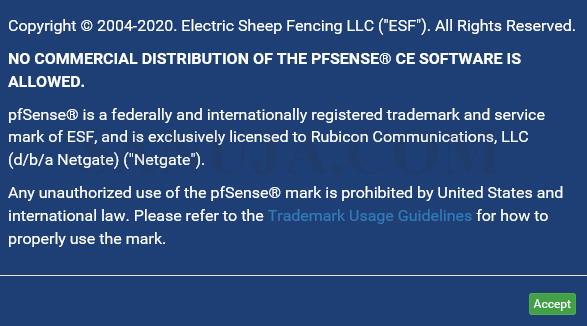
Accept the software agreement. The pfSense is an open-sourced software maintained by Netgate.
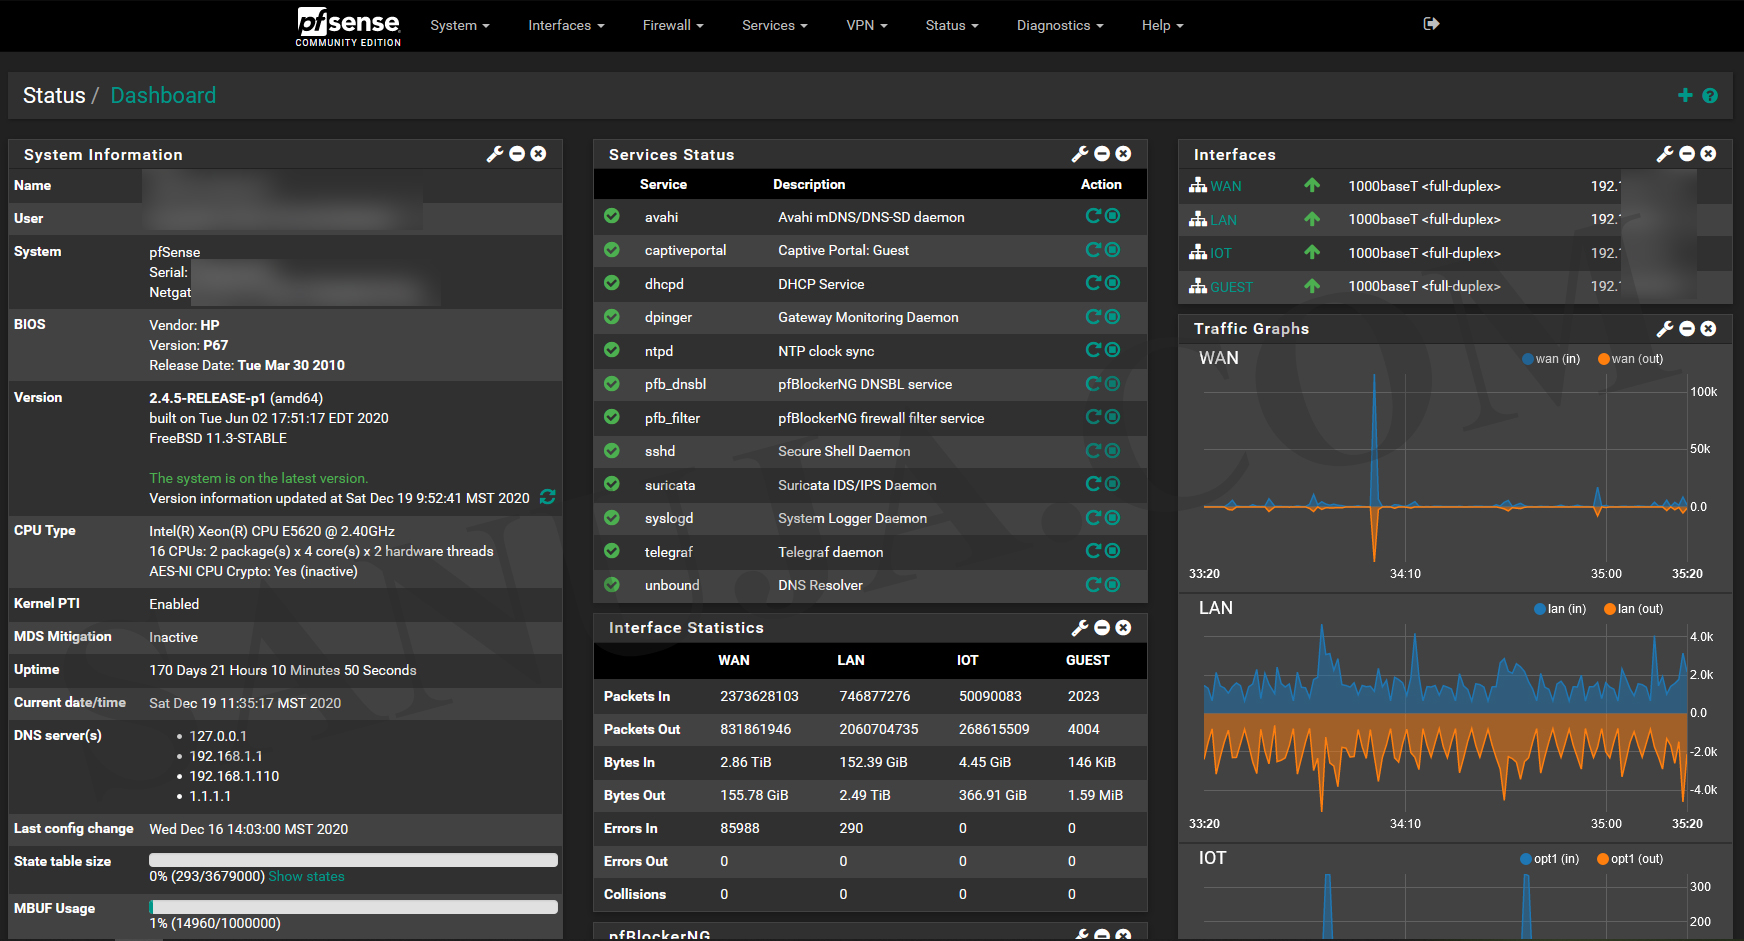
Welcome to pfSense. Your basic Dashboard look similar to the following.
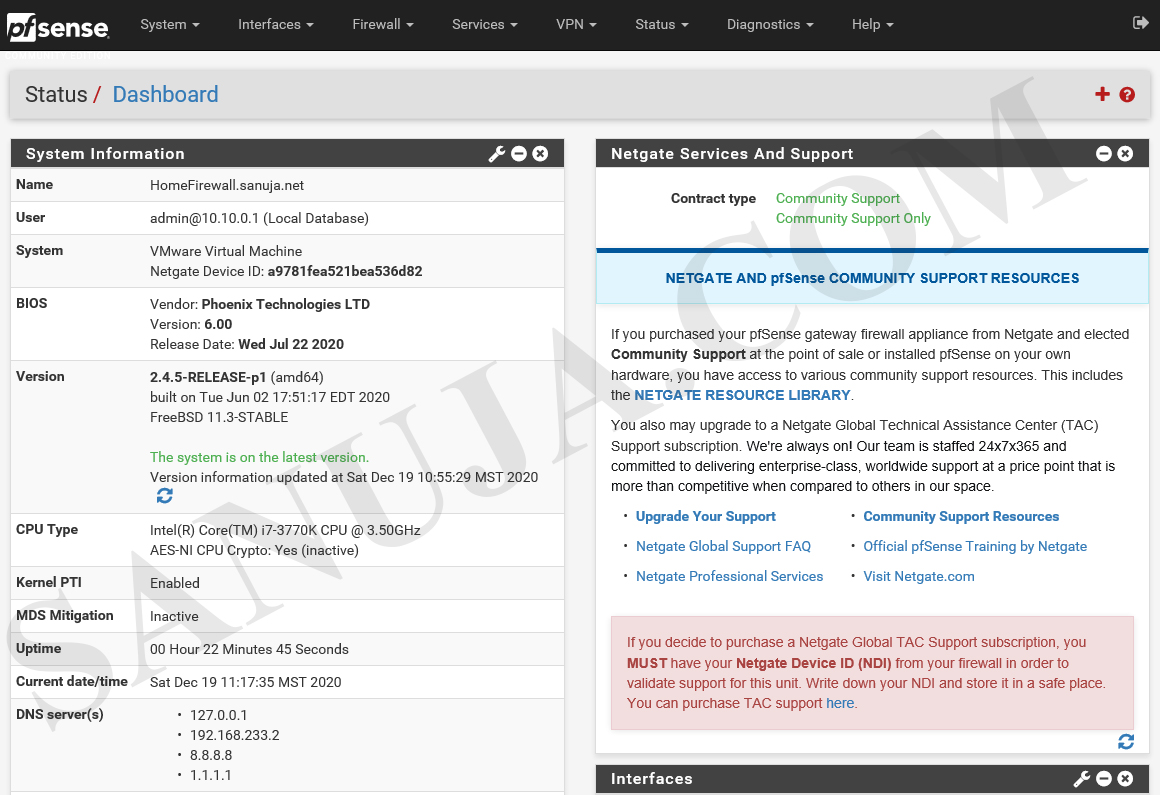
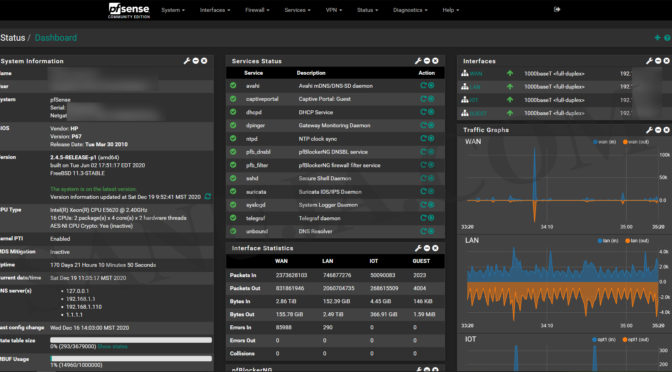
You now have pfSense installed and basic configuration completed. In a future article, I will explain advanced configuration of pfSense firewall including VLAN separations, popular third-party packages, etc. For now, here is an example of an “advanced” dashboard.