Google is a very popular search engine. One of the driving forces behind the popularity is Google Inc’s generous offers such as free site-based search. The Google Custom Search Engine (CSE) is a such free Webmaster tool. It allows the site owners to integrate the powerful Google search system into their website. I already discussed how to replace the default WordPress site search with your CSE. In this article, I will introduce you to creating content filters.
Filtering the web
As time progress, the number of pages and media also increase with it. This is not just true for large scale cooperate websites, but also true for personal websites like SANUJA.COM. Someone who publishes articles and other web items regularity would at least have one or two articles/items per week. If you multiply them by the number of weeks per year, that’s a lot of information. The problem with the general web search on your site is that the visitor may move out of the site as a result of it. The solution is to use an integrated site search that only searches your site. All Content Management System (CMS) comes with some form of built-in or modular site search. For average web owners, that’s all they need. But what if you would like to have more control over how the site content is search? The CSE will allow you to restrict your search to a specific area of your site. This is how you configure your Google CSE to refine your search results.
Refining
If you have a section of your website that is more important than the rest, then refining is a good way to help the visitors narrow down their search. For example, on my site, I empathize the academic exam bank. I want my visitors to filter out all the materials under Exams and Resources during a search (if desired). Here are the steps to creating a refining filter:
1. Log-in to Google Custom Search Engine (GCS) and select the search engine you would like to edit.
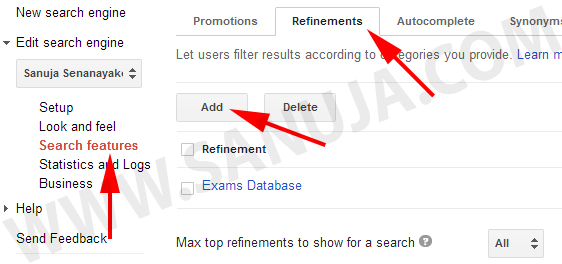
2. Choose “Search features” from the right hand menu and select the second tab “Refinements”. Now press “Add” button from the Refinements pane.
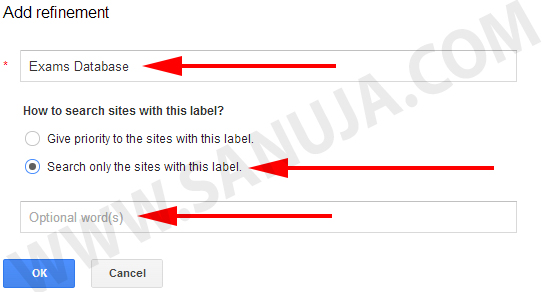
3. A pop-up window will appear with form for new Refinement addition. Save the item.
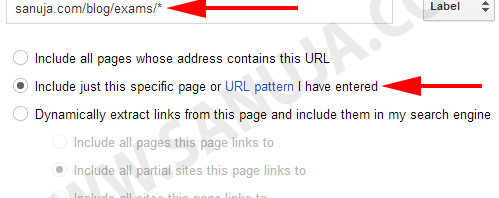
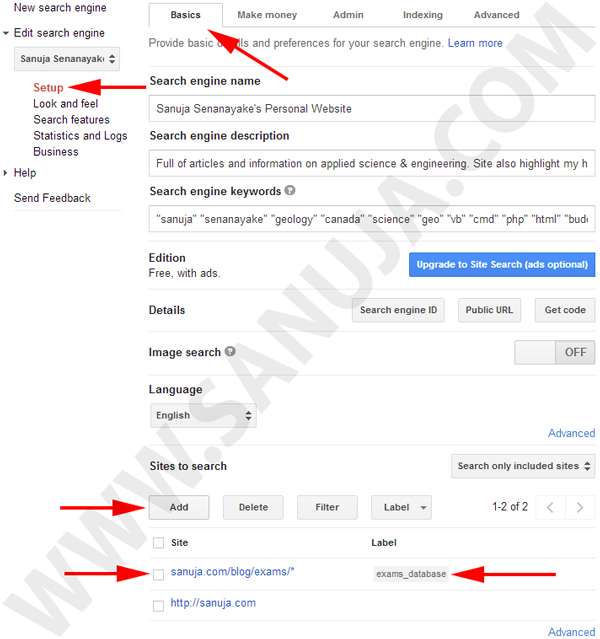
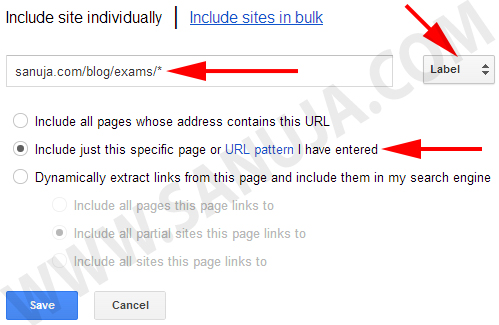
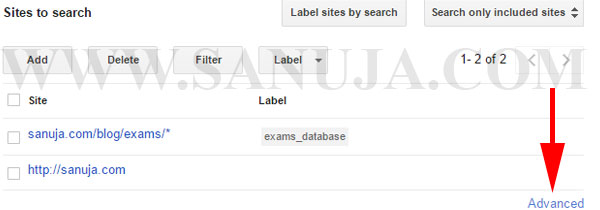
4. Choose “Setup” from the right hand menu and select the “Basics” tab. Under “Sites to search” you can add a limitation.
In this particular example I provided my visitors an option to limit their search to my exams area. Since all my exams bank questions are followed by the common URL, “https://sanuja.com/blog/exams/*”. Which is like a prefix. It will allow the Google CSE to limit all the returned search results to Exams pages.
5. Choose the Refinement option created in step 3.
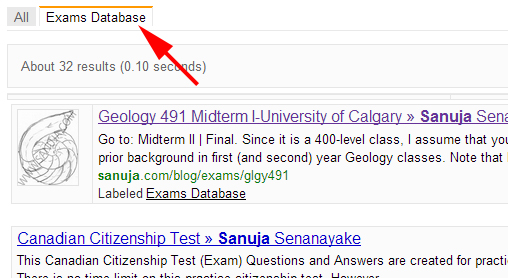
Here is an example of a refined search…
Excluding content
You can prevent the Google Custom Search from indexing certain pages or URL (link) patterns. To do that, you can:
1. Navigate to exclude section by clicking the “Advanced” link at the bottom of “Sites to search” section.
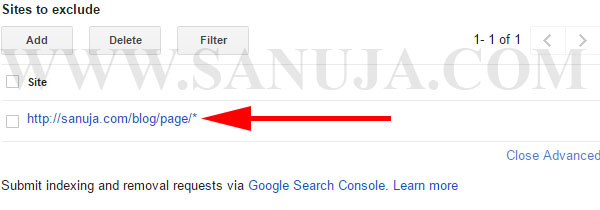
2. Once in the Advanced sections, you should see “Sites to exclude”. Add either one URL at a time or use the prefix method just like in the refinement configuration.
There are few reasons to why you may exclude URLs, pages, images or other data. Pages from access restricted or membership based areas can be hidden from search results to prevent unwanted traffic to such areas. Sometimes images have copyright agreements that specifically restrict your users from searching images. You may have “junk” or temporary URLs such as http://domain.xxxx/P?7299 which often generated by some Content Management Systems or plugins/scripts.
