We will look at 3 methods of updating drivers in Windows 10 operating systems (aka How to Update Drivers). These methodologies should work on most PCs with other versions of Windows.
Create a Restore Point
Warning!
Updating the drivers may result in boot loops or malfunctions in some situations. When updating manually, please make a restore point and backup your data before installation. Some driver updates may require the uninstallation of current drives before installation. Microsoft recommend method often could not find the most up to date drivers.Even Microsoft official documentation has no mention on creating restore points before trying to update your drivers. It is very important to do so specially if you are updating the drivers using downloaded files.
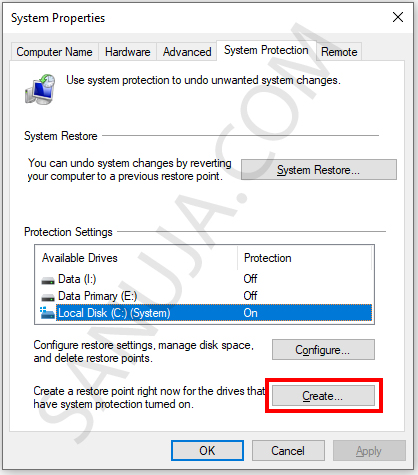
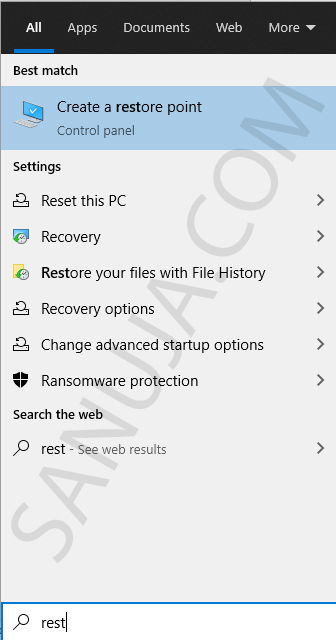
Step 1: Search for “restore point” on Windows search (Windows menu and start typing). Open the application, Create a restore point.
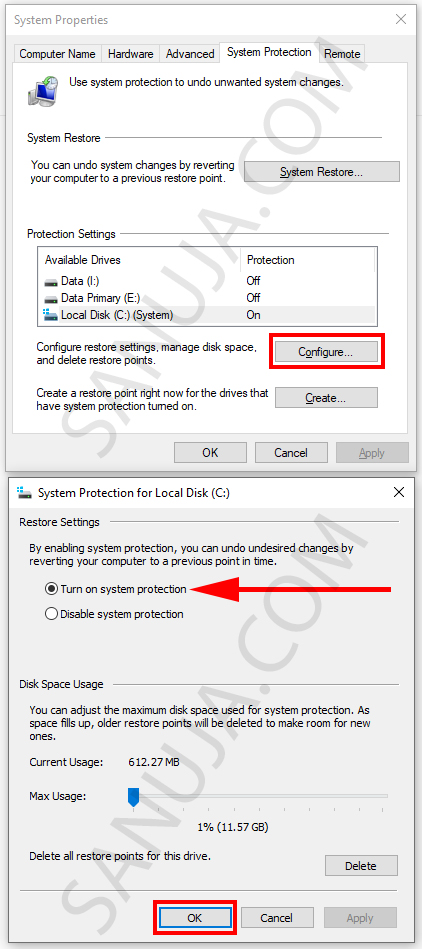
Step 2: Select the System drive C with the Windows installation from Protection Settings and click, “Create…”.
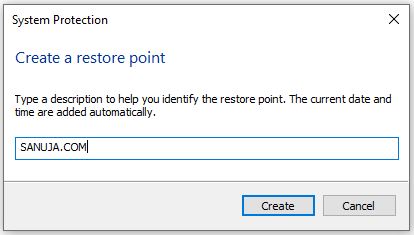
Step 3: Type a name and click, “Create”.
It is that simple! A bonus tip is that you should have the Protection turned on at least on your System drive. To do that, select the drive and click Configure… Then select Turn on system protraction and you can leave the rest of the settings in default.
You may also follow this video demonstration on how you can create a restore point in Windows 10 and 11.
Official Manufacture
You can also update your drivers using the official manufacture software. For example, printer manufactures have software packages that includes the drives. The motherboard manufactures have software packages that will make updating not only the drives but also the BIOS/UEFI firmware as easy as clicking few buttons. Please use such software whenever possible. Some of this software includes Asus AI Suite, HP Printer software, Nvidia GeForce Experience, Intel Driver & Support Assistant and many more.
However, this is not always available to consumers. Alternatively, you may be able to download the drivers from the manufacture’s website. If the downloadable packages are in executable format (.exe), they can be installed with few clicks. If they are drivers itself, you need to install them via Microsoft Device Manager, which we will discuss now.
Microsoft Recommended Method
Warning!
A driver update on a device could cause malfunctions to seemly unrelated devices. If one or more devices become sluggish or unresponsive after a driver update of another device, please check for driver update for the device experience problems. In rare situations, you may have to rollback the driver update due to system stability issues.The Microsoft recommended method is to use Device Manager application (Control Panel applet) to check for updates one device at a time.
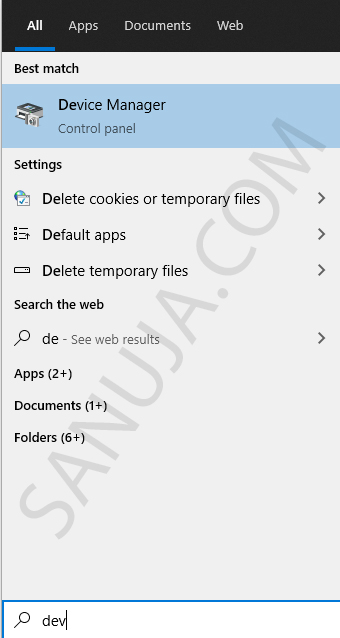
Step 1: Search for “device manager” on Windows search. Open the application, Device Manager.
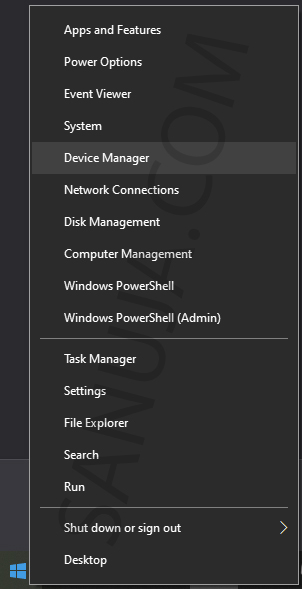
You can also open Device Manager by: right click on Windows menu icon.
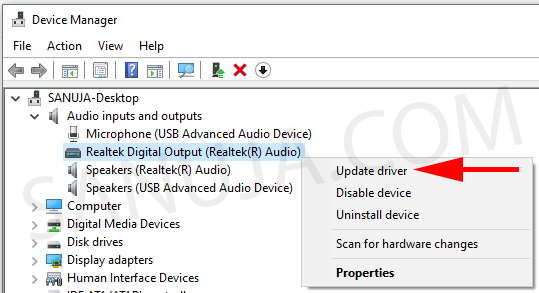
Step 2: Find the device from the list and right click and select “Update driver”.
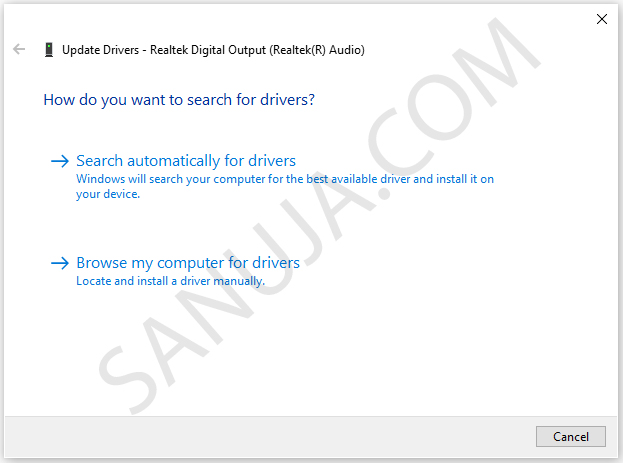
Step 3: Choose either of these options based on your situation:
Option 1: If do not have the new driver files, select “Search automatically for drivers”
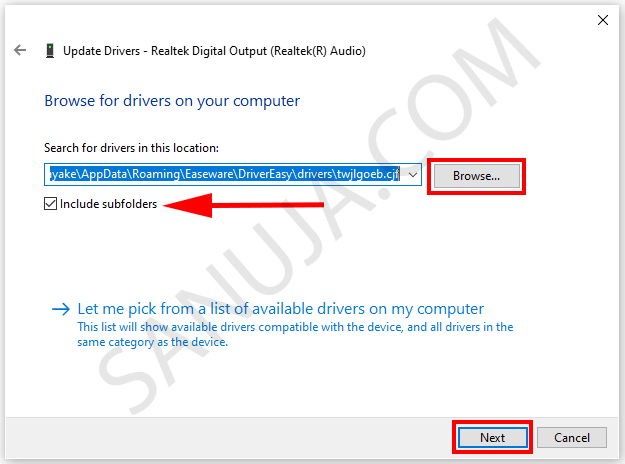
Option 2: If you do have the new driver files, make sure the checksum (or MD5 hash) match against the manufacture’s database. Then select “Browse my computer for drivers”.
Then select the file location. I would recommend also checking off the “Include subfolders” option. Finally click Next to update the drivers.
Pitfalls of Microsoft Recommended Method
In my experience, the Device Manager update driver’s method is not very reliable in finding the most up to date drivers for most components. This is caused by the Microsoft driver database not being updated in a timely manner.
Now you would ask yourself, why would you care if your drivers are updated? Well, you could crash your computer after software or OS updates if the drivers are not updated prior to the software or OS updates. I had a situation when I upgraded from Windows 8.1 to Windows 10 my computer went into a boot loop. After troubleshooting, I realized that I had to reinstall Windows 8.1. Then I manually updated each and every driver. This can be painful since we a typical Windows PC could have hundreds of devices.
So, what is the solution? Well, using a third-party driver update software to bulk scan for drivers. If you do not mind doing bit of extra work, you can get away with free versions of these programs as opposed to buying the premium. These solutions include but not limited to, Driver Booster, Snappy Driver Installer, DriverPack Solution, DriverCloud, Free Driver Scout, DriverIdentifer, Device Doctor, Driver Hub, Driver Easy and many more. Most of these programs comes with free and paid versions. Depending on the software, there are limitations on the free version. I use Driver Easy free version (not because I have tested all the others, but Driver Easy worked well in for me in the past).
Update Drivers using Driver Easy
Notice
I am not sponsored by Driver Easy or any other organization. This article is written based on my experience. I do not endorse one third party driver update product over the other.Updating drivers using Driver Easy free version can significantly reduce the amount of time you spend looking for the correct drivers.
Step 1: Download and install the free version of Driver Easy from their website.
Step 2: Scan your PC with Driver Easy free version. After the scan, it should open the Update tab or click Update tab. It should list any drivers that are out of date at the top.
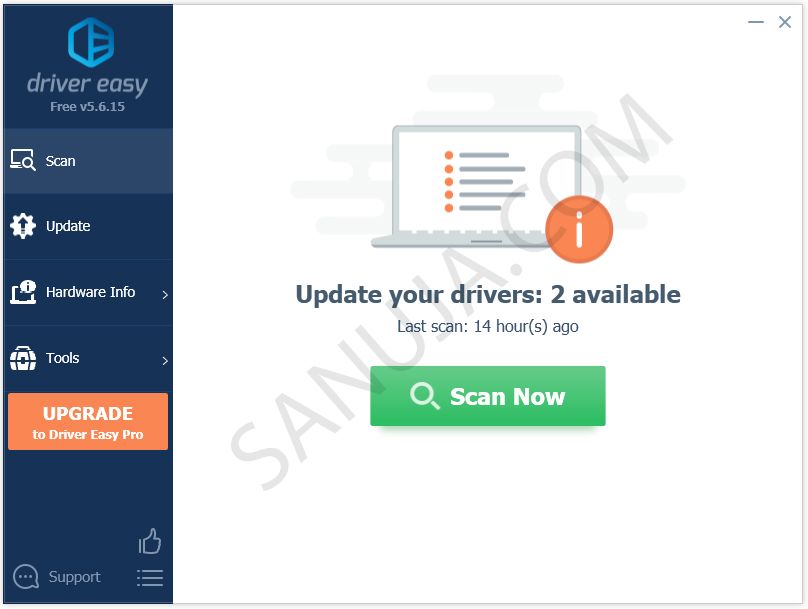
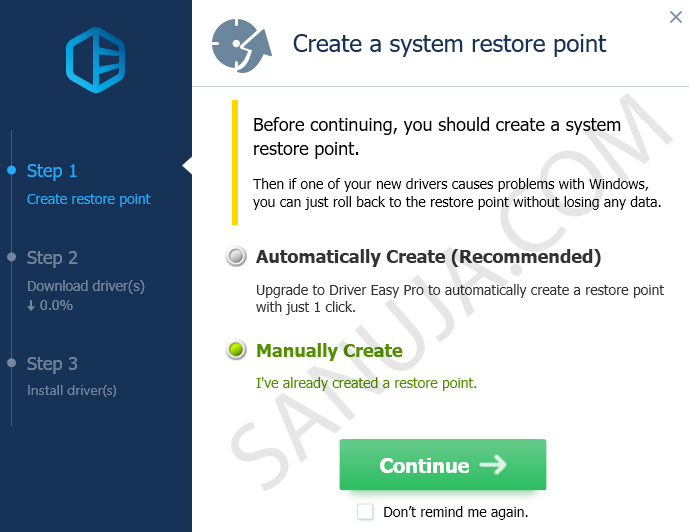
Step 3: Click “Update” button. It will remind you to create a restore point. Free version of the Driver Update will not create a restore point or install the driver for you. Select Manually Create option and click Continue. You should always create a restore point before updating the drivers. If you don’t know how, please read the beginning of this article.
Step 4: Once downloaded, select Manually Install and click Continue. Driver Easy should open the folder with the downloaded driver. If not, you can go back to the main Update screen and click on the drop-down button next to the Update button and select, “Open File Location”. Copy the full path of the file location.
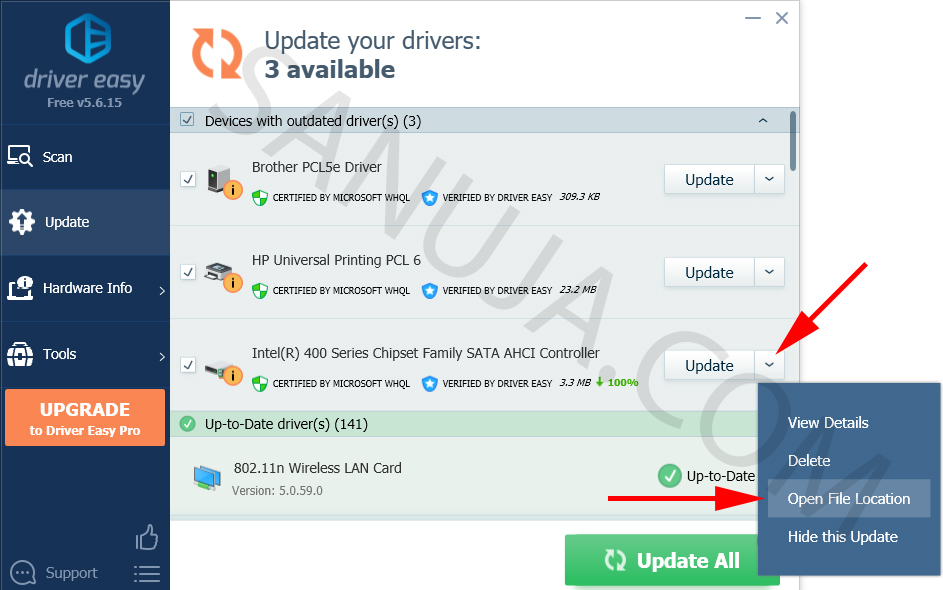
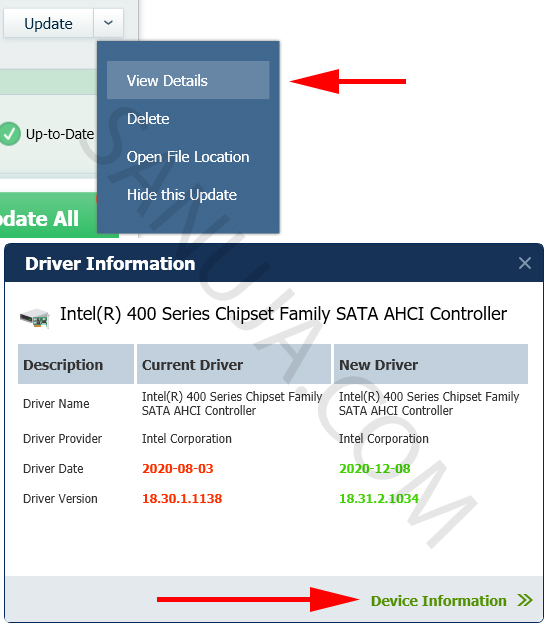
Step 5: From the drop-down menu next to the Update button, click View Details. It should provide you with just enough details to narrow down the device name that should appear on the Device Manager.
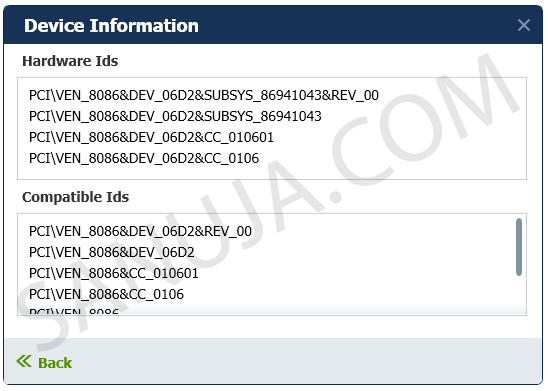
Sometimes it is hard to find the device to be updated in the long list of items in Device Manager. You can get more information under “Device Information” section.
Step 6: Open the Device Manger. Locate the device and follow the instructions under Option 2 here for manual update.
