It is essential for a Earth Scientist to be skilled at using the tools of the trade. From day one, students are trained to use the Brunton Compass, a highly popular measuring tool. I am very proud to say it was first designed and developed by a Canadian Geologist, David W. Brunton. If properly used it is a great tool for taking precise geological measurements within few degrees or meters of accuracy.
Parts of the Unit
Initially the compass was made out of metals which makes the unit very expensive. Recently the Brunton company produce two different versions of their models; one with the original metal body and another with high density plastic. I personally prefer the original unit because I like the weight and feel of it. However, both versions will provide the same results and both versions comes with exact same layout.
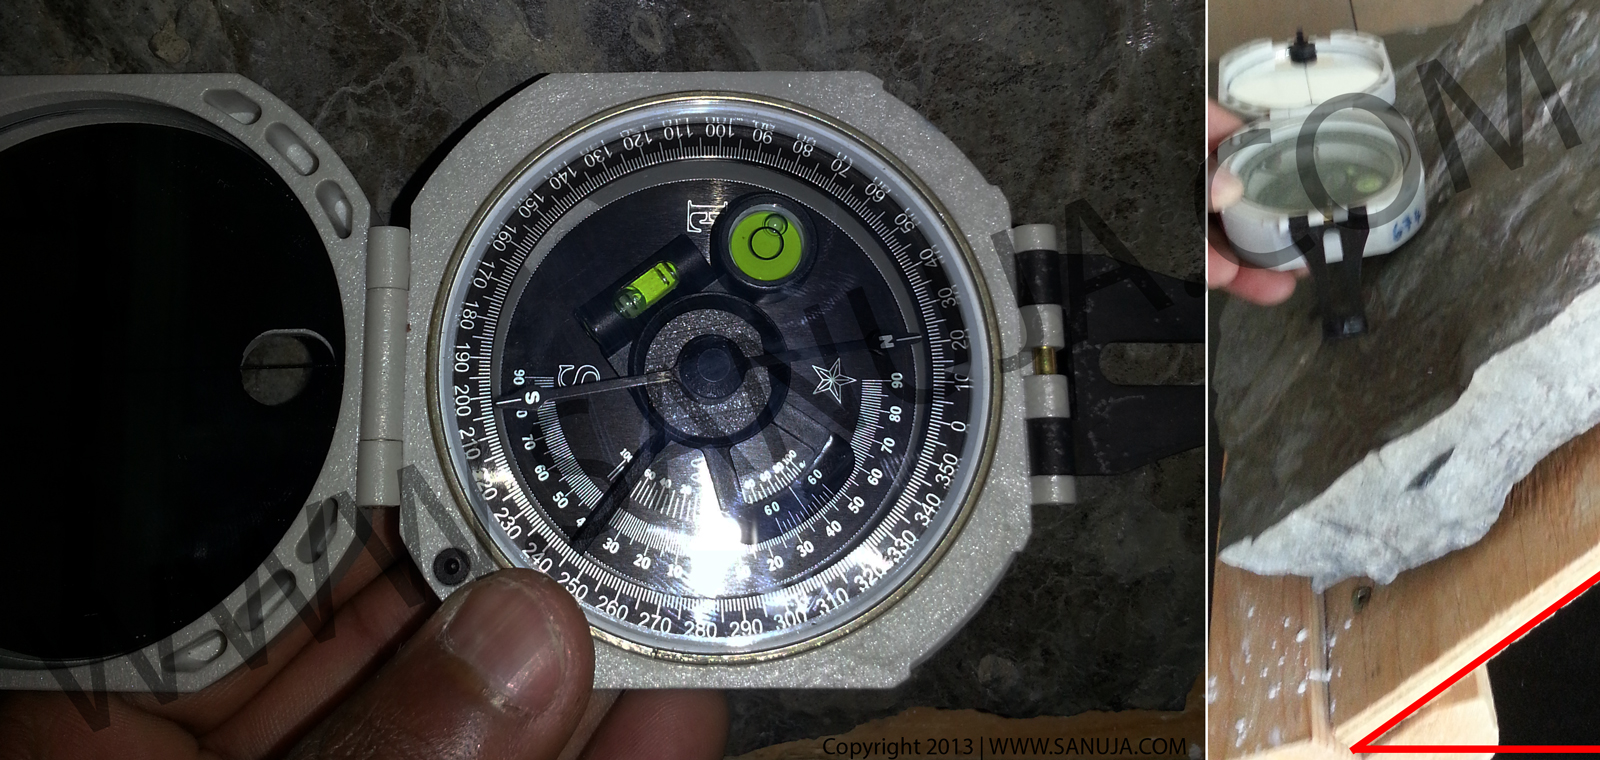
Before start using anything, we need to learn the layout and features of the device. The compass has a hexagonal shape to it’s outside perimeter creating flat perfectly straight surfaces. This is not for aesthetic appeal. The flat surfaces, specially on each side, provide the support for measuring angles of inclines and angles of strike of Geologic features. The base casing has an arm mounted to the body for directional measurements. Even the cover (lid) of the unit has a mirror which function as a sight taking tool. Everything on the Brunton Compass is a tool.
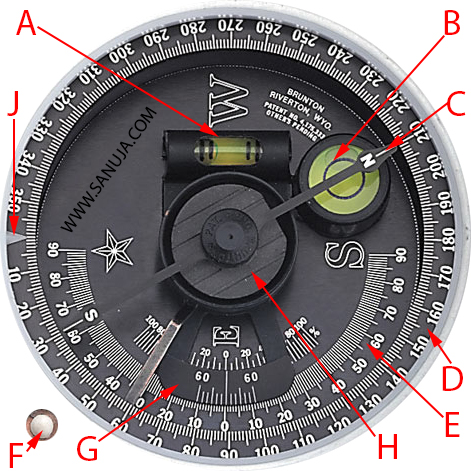
Above image is a picture of typical Brunton Pocket Transit Compass model used by universities and professionals. A list of key components on the base casing can be summarized;
A – Long Level – Use for taking azimuth measurements of strike.
B – Circular Level – Use for taking angle measurements of dip.
C – Iron Needle – Points to magnetic North and it is damped using the magnet below the pivot point. But the bearing can be adjusted accordingly by rotating the declination zero pin.
D – 360-degree Graduated Circle – Use for azimuth readings that are accurate to half of a degree.
E – 90-degree Dip Circle – Use for measuring dip using the long level on the vernier.
F – Needle Pin – Helps to lock the needle in place in order to take a reading.
G – Vernier – The vernier is used for inclination measurements with an accuracy to 30 minutes.
H – Rare Earth Magnet – A cast NdFe magnet which allow the iron needle to seek North accurately and quickly. It also reduces the magnetic interferences from the nearby environment.
J – Declination Zero Pin – An arm behind the compass is used to move the pin. Using tabulated data on magnetic declination, the degree of correction is set.
Usage
Here is an example of taking a strike on an inclined surface. Taking dip measurement is not shown here, but it is done by laying the Brunton Compass on the side along the dipping surface. By moving the vernier and long level, you can measure the dip.