I am fortunate enough to find a great summer job at the University of Calgary. I am working for the Geoscience Department cataloging rocks, minerals and other lab materials for a digital database. One thing I notice is that in order for a Geologist to be competitive, these days being “technologically inclined” is a great asset. Not only most of the Geological work is done using software, but even the most basic skills in Geology now being learned by students using technology. While it is not a replacement for hands on experience, the digital media is changing the way we teach Geology forever.
I went to BestBuy and just brought a macro imaging lens for my DSLR, Nikon D80 for taking pictures for the digital database. Along with a great Nikon camera control software, I am hoping that my armature images will turn into a masterpiece collection.
Equipments and Settings
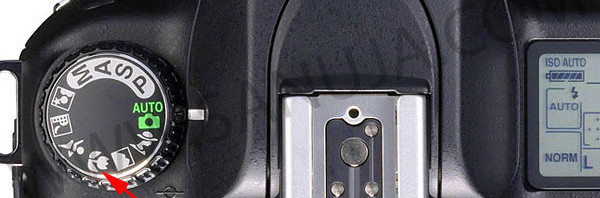
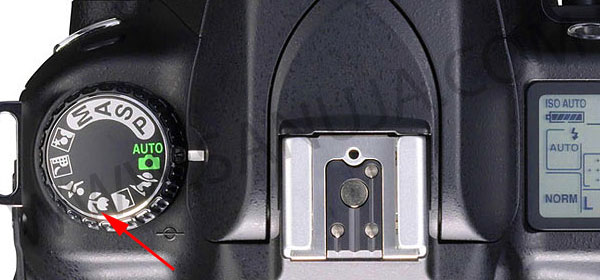
If you want to taker images of minerals and rocks highlighting the cleavage, fracture and small details like that, use a micro lens. The settings ideal for each scenario can varies but in general, placing the selector on Micro mode will brig out the details of the subject.
Never ever save any Geologic photographs in pure JPEG mode. If your camera is a DSLR like my D80, change the file processing settings to high resolution JPEG and RAW. This is like a safety net in case your pictures are not satisfactory, instead of going back to the rock/mineral sample, you can try to edit the RAW file and export it as a new JPEG for publishing. When using image editing software like Photoshop, do not use file size compression. Instead, save the files in the maximum quality, but may reduce the image dimensions to reduce sever load. I found 1200 by 1200 is the best for minerals (close ups) and 900 by 900 is the best for rocks. I also recommend using a CMS (Content Management System; Drupal, WordPress, etc) or a gallery software for server side file compression.
If you have having trouble focusing, try manual focus. If you want to take exclusion of k-feldspar for example, physically get as close to the rock as possible. This will avoid, blurring of the edges of the rock (out of focus). To avoid “shaking” the image, use a tripod. You may want to invest in two different types of tripods; a small scale one and a standard. However, I was able to use a standard. 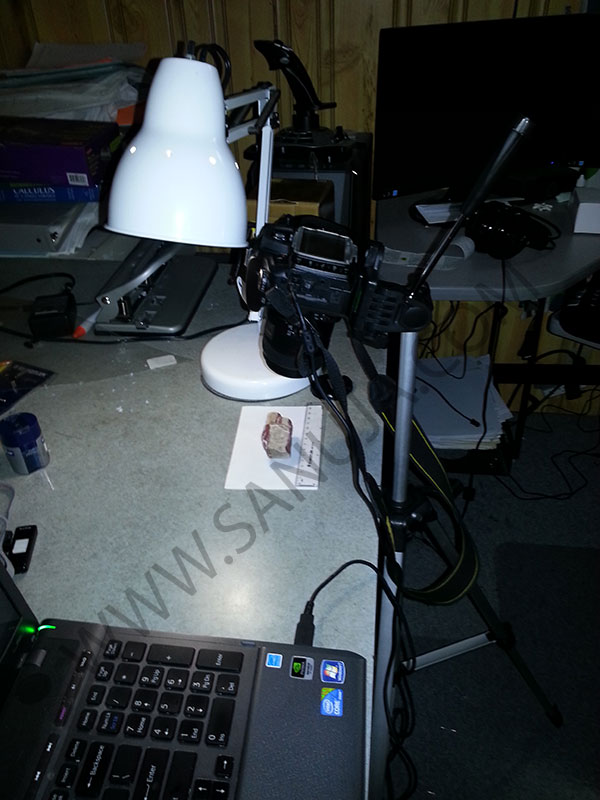
I use a software to control the camera, which will further reduce the “shake” when taking the image. You could pay for a software developed by the camera manufacture, in this case Nikon or there are many free software available online, so try Googling them!
The identification of minerals and rocks hand samples depend on texture, associations, cleavage, luster and sometimes even colours. Therefore, do your best create images with natural colours. I found sometimes the built-in flash could “tint” the image yellow or white. To avoid this, I had to use better lighting equipments. Changing the angle at which the picture as taken can also effect the colours. Determine the natural colours by examining the samples before you take any images as use it as a guide. It is useless to document a hand sample without proper coulor control.
When publishing your hard work on the web, it is very impotent to add a copyright claim. While I do believe in free education for all, I also strongly support intellectual recognition. Place a copyright on your image using a program like Photoshop (PS). In PS you could create a layer or a “stamp” and simply use it as a template to add copyright to every single image.